Workspace Wednesday - Manual Die Cutting Within Reach

Wednesday, April 2, 2014

I still have a few of the regular posts that I wrote before I took a permanent break from my daily blogging schedule, and from time to time I'll drop one of them here. That's not to say that I'll never participate in something like Workspace Wednesday again, but it definitely won't be a weekly thing!

When something isn't getting used in my craft space, it usually means that it's not being stored where I can easily get to it and then just as easily put it away. Take my Sizzix Big Kick, for example. I love using it (especially with alphabet dies!), and I have a healthy collection of dies thanks to a year and a half spent on the Lawn Fawn design team and more than a slight addiction to Papertrey. Unfortunately, a manual die cutter does have a fairly big footprint, so it's not something I'm willing to just leave sitting out on my scrapping surface all the time. Instead, it and my Xyron were shoved onto out-of-the-way, inconvenient shelves, meaning they didn't come out to play very often.

Until now, that is!

DSC_4754.jpg

When we built my new craft table last fall, I knew that die cutting tools were one of the things I wanted to have right within reach. This little space at the end of one of my craft table's shelves (you can see a full shot of the shelves here) is just perfect for housing both my Big Kick and my Xyron 900, which I often use to add adhesive to the backs papers before cutting them with alphabet dies. Unfortunately, the Xyron had been stored in an even more inconvenient place than the Big Kick, and I once actually lost it in my scrap room. I mean, who loses a huge Xyron 900?!? My scrap room is not that big!

DSC_4756.jpg

Both machines are now right under the top of my craft table, so I can just pull them out when I need to use them and then put them right back. My dies are on a shelf right beside my Big Kick, and you can read more about how I store my thin metal dies here.

DSC_4752.jpg

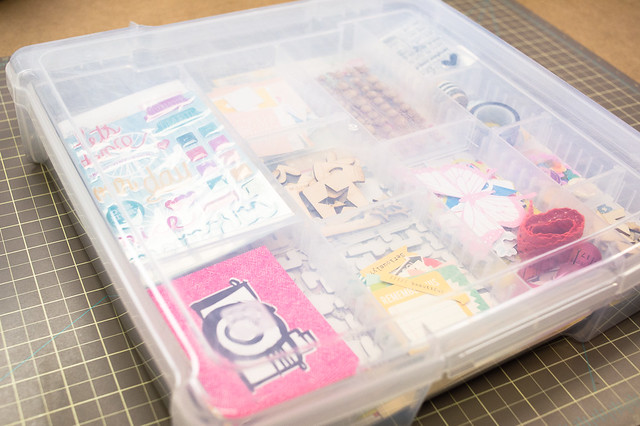
There are certain types of material such as felt and glitter paper that I normally only use when die cutting, so I've gathered all of those together to make them easy to find, too! That was actually a project that I tackled last October, and now, nearly 6 months later, the contents those three IKEA Alex drawers are staying organized and getting used, so I think I have a winner here! You can read more about how I organize these drawers here, but if you just want pretty photos, I took a new round to share. :)

DSC_4740.jpg

DSC_4741.jpg

DSC_4743.jpg

DSC_4745.jpg

DSC_4749.jpg

DSC_4750.jpg

DSC_4751.jpg

My Silhouette sits on top of the Alex cart, and I'm actually reworking the large furniture pieces in this area right now, thanks to my new desk that I picked up on my last trip to IKEA. That should put my Silhouette in a spot where it's super easy to use, and I'll share that down the road as I have time.

Workspace Wednesday - Working Kit Storage

Wednesday, March 5, 2014

The March kits went up for sale over at Citrus Twist this morning, and I thought this would be a great time to share the new "working kit" storage that I've been trying out this month.

About a year and a half ago I wrote a post about how I was using some super cute trays from Target's summer dishware collection to keep my current kits corralled. A couple of months ago I started to realize that being able to quickly and easily put something away was just as important to my organization as being able to quickly get it out and work with it. The trays were wonderful to use with my kits while they were out, but putting them away when I needed to work on a different project? Not so much. There were just too many loose pieces that needed to be stacked and balanced.

DSC_4762.jpg

Enter this Iris Organizer Tray, which fits neatly into any one of the many 12x12 Iris cases I already own. You can find them here on Amazon, though they are ridiculously priced through that link. I bought mine at Michaels when their storage items were 40% off, and they were offering a coupon for 25% off on top of that. I bought two for less than $9.00 total- one for my current Citrus Twist kit, and one for either a project kit or for a past kit that I've pulled out to scraplift my way through (long story short- I've decided to kill old kits by scraplifting anything from the design team gallery for that kit that I like).

DSC_4763.jpg

The trays are already molded with the vertical (top to bottom) dividers in place, and they come with quite a few of the smaller horizontal pieces that you can use to make your own compartments in the tray. In the photos above you can see mine configured to work with the smaller pieces of the Citrus Twist March Kits, right before I started working with them. I loved having the kit in this box- it was so easy to pull out the tray and set it to the site, revealing the paper underneath...

DSC_4766.jpg

...and also the alphabets, paper pad, and larger sticker sheets that didn't fit into the smaller spaces above.

DSC_4765.jpg

The only warning I have about this tray is that unless you have the area in the box under it completely stuffed with paper, the tray doesn't make contact with the lid. It's not a huge deal, but it does mean that you need to store the box flat to keep the small items from shifting to other compartments or even slipping out of the tray entirely.

DSC_4761.jpg

Wondering what will become of those lovely Target trays? They're actually already being repurposed, which is what happens with most of the organize-y things that I buy that turn out to not be as awesome for their intended use as I thought they would be. I have a little spot in the attic, right at the top of the pull-down staircase, where I stack all of these items, and it's the first place I check when I need a container or bin. Items shuffle in and out of the area constantly, and almost everything finds a new home eventually. These trays didn't even make it to the storage area, though- they're already destined for use in our camper this summer!

Worspace Wednesday - The Perfect Paint Shelves

Wednesday, February 26, 2014

Please do not let the clean desktop in this photo fool you! I confess that I moved more than a few piles that were on it to the floor temporarily just so I could take this photo of my new paint shelves! I did not, however, change what was playing on my iMac- Stargate: SG-1 has been going almost nonstop in here for the last few months and has helped me get through the winter.

DSC_4721.jpg

I say "new" shelves, but in reality I've had these two for a very, very long time. My parents made them when I brother and I were little, and when I was in grade school we each had one in our rooms to hold McDonald's Happy Meal toys and other small treasures. Eventually after college I inherited Jon's shelf and have had the pair ever since. For the last few years they've been in my attic, just waiting for the right use in this house, and when I spotted this post on Infarrantly Creative with that awesome tall paint shelf (she also has instructions should you wish to build something similar), I knew they would be perfect to house my collection of craft paints, spray mists, and another arts-y mediums.

DSC_4729.jpg

Yes, I do realize that is an insane amount of Martha Stewart craft paint! I went a bit nuts one day when Michaels had it on sale for 30% off with an extra 25% off your entire purchase coupon going at the same time, making it well under a dollar a bottle. I do love painting with it and also use it to make DIY spray mists and my own watercolors, but I also think it just looks really pretty and consider it a practical part of the room's decor.

DSC_4732.jpg

I also have my embossing powders and spray mists on these shelves, and I'm already using them more now that they're so accessible. The mists I will be glad to use up and get rid of since I have so much trouble with the nozzles getting clogged- ugh! The little mini-misters that I use to mix up my own color sprays seem to be a lot better about that, plus each color gets made in such tiny amounts that they get used up quickly, anyway.

DSC_4738.jpg

Darren also recently hung that strip of pegboard that's hanging to the right of the desk, and I have some colorful ideas for what I want to do with it. As soon as it's done, I'll be sharing that in another Workspace Wednesday post!

Workspace Wednesday - Labels and Tags

Wednesday, February 19, 2014

This Workspace Wednesday is all about labels. And maybe a little about tags. :)

I use labels quite often in my Project Life layouts, and tags make a regular appearance on many of my scrapbook pages. Instead of sorting these items by color, I decided to group them all together in two bins at the very end of Frankentable's shelves...mostly because I really didn't feel like cutting them all apart and sorting them by color, and also because they're one of the few items that I go looking for by function rather than color. Plus, I just think they all look pretty together!

DSC_4586.jpg

I keep my label stickers grouped together in an ice cube bin that was the perfect size to take up the rest of the space on a shelf after my color drawers were in place. I bought mine for about $4 at Target, and Amazon also carries them. It's super easy to slide it out, flip through to see if anything inside will work with my current project, and- most importantly- it's simple to put it away again!

DSC_4587.jpg

Inside are label stickers of all kinds, including Martha Stewart labels from Staples...

DSC_4590.jpg

DSC_4591.jpg

...and labels from scrapbooking manufacturers like My Mind's Eye and Bella Blvd. I don't keep them sorted in any particular order beyond keeping the printed ones off to one side and the blank ones on the other.

DSC_4592.jpg

I've also started adding little sticky-tab pads to this box, too, including little Post-It Note type stickers from Basic Grey and Studio Calico. I use them in pretty much the same way I would a label, and, again, I'm just really not in a mood to split these all up by color!

DSC_4593.jpg

I keep the little sticker sheets that come with Simple Stories Sn@p Sets in here, too, since they often have several labels on them.

DSC_4594.jpg

I also have another identical bin on Frankentable's lower shelf just for tags. I order my gray and white tags in bulk from the office supply store (I think these came from Staples) and am always reaching for them to use for journaling on a layout or a Project Life page.

DSC_4595.jpg

If you're confused by the Frankentable reference, you might want to check out this post in which my Dad and Darren built me the best scrapbooking table ever...using two old bookcases and a sheet of MDF!

Workspace Wednesdays are inspired by Marcy Penner's post series, where she shares glimpses into her creative space and invites other crafters to do the same.

Workspace Wednesday - Wrangling Kit Washi

Wednesday, February 12, 2014

Welcome to another Workspace Wednesday! This week I have a little tip for storing the washi tape that comes in scrapbooking kits.

DSC_4561.jpg

Normally I store my kits in 2.5 gallon zip-top bags once I've done scrapbooking my first round of layouts with them so I can pull them out later when I'm ready to use them again. I'm actually considering splitting most of my older kits up into my stash, but I haven't completely made up my mind about it yet.

One thing I'm not storing with the kits any longer? The washi tape that comes with them.

DSC_4562.jpg

Washi tape is one part of a kit that I know I will never use up before I've completely killed a kit- there's just so much on a single roll! The rolls are also bulky and take up extra room in my kit storage baskets, so now, instead of storing them with the kits, I'm storing them on my pegboard with the rest of my tapes.

I do want to remember which washi tapes were sent with each kit, though, so, before separating them, I tear a little bit of tape off of each roll and adhere it to a shipping tag (I bought these in bulk from Amazon long ago) that I place in the bag with the kit. That way, when I pull the kit back out to use again, I can easily find the matching tapes in my washi stash. In the meantime, the rolls are out where they can be seen and used (and hopefully eventually used up) on other projects.

DSC_4564.jpg

Workspace Wednesdays are inspired by Marcy Penner's post series, where she shares glimpses into her creative space and invites other crafters to do the same.

Workspace Wednesday - Project Life Card Dividers

Wednesday, February 5, 2014

I think I'm going to like Workspace Wednesdays- they'll give me a weekly kick in the pants to get moving on some of those little projects I've been wanting to do in my scrap room!

This week I decided to tackle making dividers for my Project Life card storage. I mostly sort cards by color (there are a few sub-categories, but I'll share that another week when I finally have them all sorted), and up until now they were all lined up in Atonius inserts from IKEA with one color group running into the next and nothing between them.

DSC_4529.jpg

At first my plan was to cut dividers from cardstock on my Silhouette, but then I had a better idea- make them out of wood!- which is a job best left to my laser cutter. It was also a chance for me to make something for myself with it for a change! I was so excited when I first bought it because it meant that, along with doing cuts for others, I could cut anything I wanted out of wood, but can you guess how many things I've made for myself before this project? That would be a big, fat zero. Time to fix that!

DSC_4531.jpg

I used the tab card from this cut file set by Elle's Studio as my base and edited the SVG to remove the text and make the dividers just a bit taller so they'd stand up above the 3x4 cards. Yes, I can cut pretty much any SVG file that works with the Silhouette on the laser. :)

DSC_4534.jpg

I'll probably do something similar for the 4x6 cards, eventually, but for now I'm just happy to be getting the 3x4s in order. It's much less overwhelming (not to mention faster) for me to find the cards I need when they're sorted like this.

DSC_4536.jpg

Workspace Wednesdays are inspired by Marcy Penner's post series, where she shares glimpses into her creative space and invites other crafters to do the same. 
CopyRight © | Theme Designed By Hello Manhattan