Just a quick note- I'm still finding and adding new collections to the Summer Sneak Peeks page and will continue to do so until the next trade show. There's even a new company on the block, so be sure to look for Photo Play Paper in the link list!
Hi again, everyone! I'm obviously taking this whole "sporadic posting" thing seriously! It's been a crazy few weeks while we worked on a huge project at the house and tried valiantly to finish it before Darren started his second year of medical school (otherwise known as M2). We're putting a pretty big workshop/shed (if you can call two stories with french doors on the entry a "shed") in the back yard and still have the roof, staircase, and siding to finish before final inspection. I absolutely cannot wait for it to be finished! Our house is small, but having it paid off made us really reluctant to go out and buy something bigger, so this is our interim solution. I'm so looking forward to having more storage and working space!
I also took a deep breath a few weeks ago and did this...
Yes, I am doing a tiny bit of designing again. I have missed Lawn Fawn ever since I resigned from their team at the end of 2013, and I've had a standing invitation from Kelly to come back when I was ready. I'll never be ready for the big number of design teams I was on previously again, but I'm really enjoying just being on one and really taking care and doing my best with just those items. Plus, I work so much more efficiently when there's a deadline involved, and my design teams used to really push me to get things finished. I can already tell that this has been a good decision for me all around since it forces me to take time out for crafting!
My work table is scattered with layouts, cards, and a couple of other projects right now, and I've been filming some video along the way, too! Inspiration Week on the Lawn Fawn blog starts tomorrow, and I hope you'll join us.
Speaking of design teams, I ran across an old Crate Paper project when I was cleaning out my blog drafts. It was never posted here because it never made it onto Crate's blog. There was a schedule change and it got lost in the shuffle, which I will admit bummed me out because it was a big, time-consuming project! All products from the Open Road collection used in this project were provided by Crate Paper in exchange for design work.
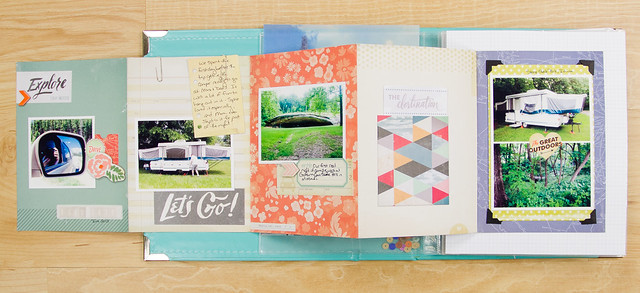
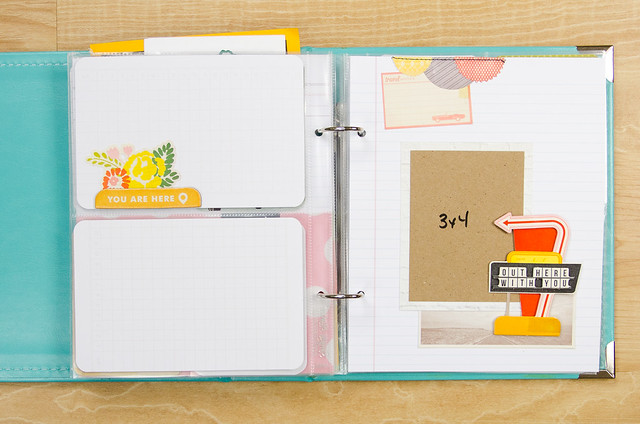
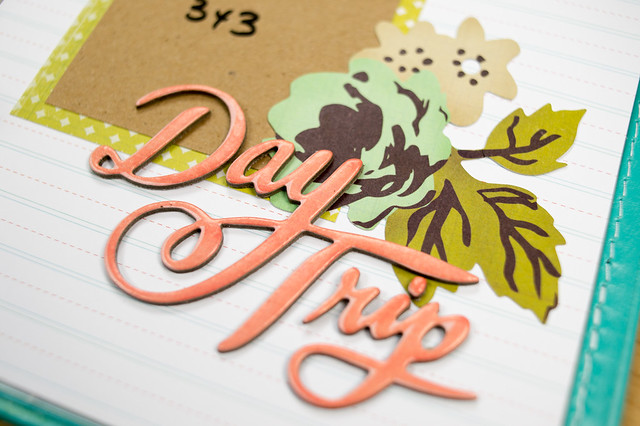
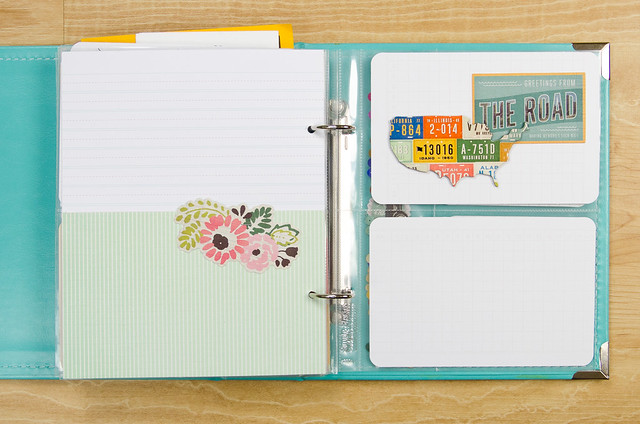
My friend May Flaum and I both acquired campers around the same time, and she had the brilliant idea of keeping a 6x8 album in hers to document each trip taken in it. With her blessing, I put together something similar for our own camper (though we've since sold the pop-up and purchased a very used Class C instead) and used it as a design team project at the same time. We've only taken two trips in our camper (and only one is shown here), but I'm looking forward to filling this up as the years go by.
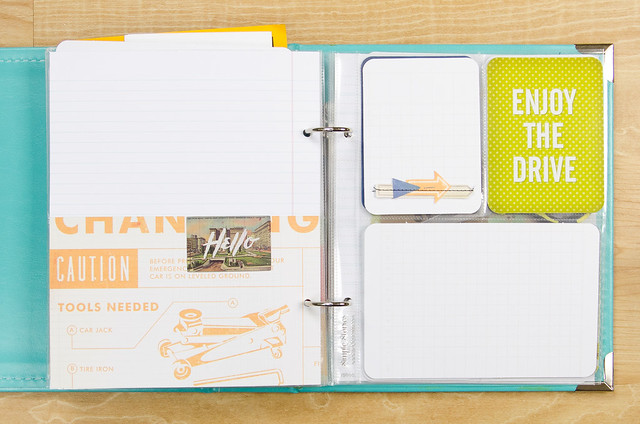
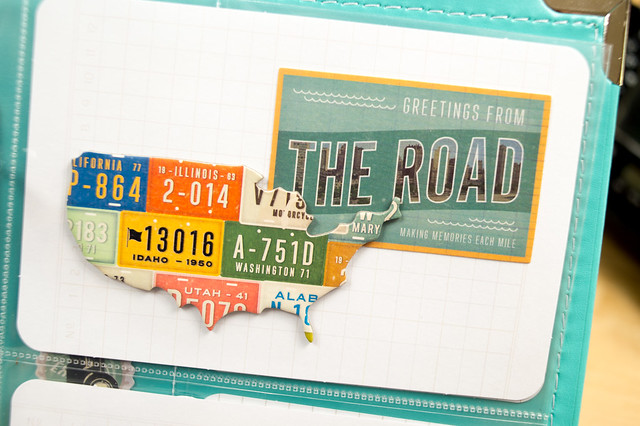
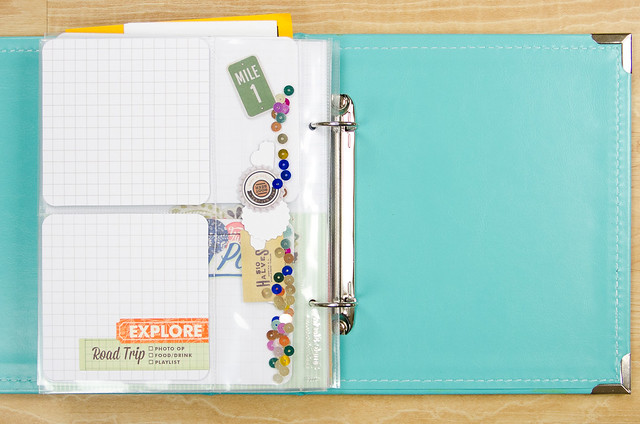
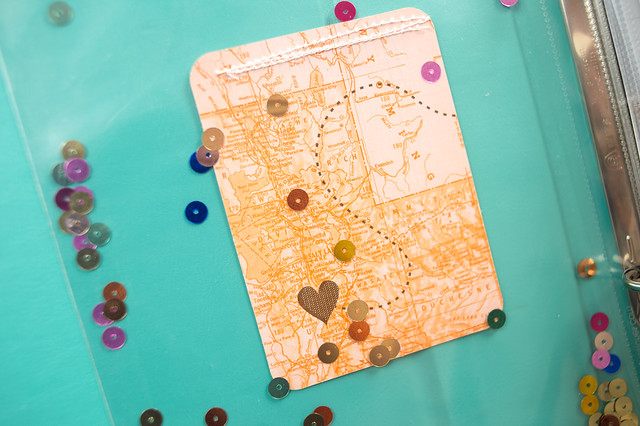
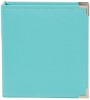
I used a 6x8 Simple Stories Sn@p album (in turquoise, of course!) as my base. The title page is a 3x4 card from the Open Road journal card collection that I sewed into place in the middle of a full 6x8 page protector. I then added some sequins to the protector and sewed the top shut.
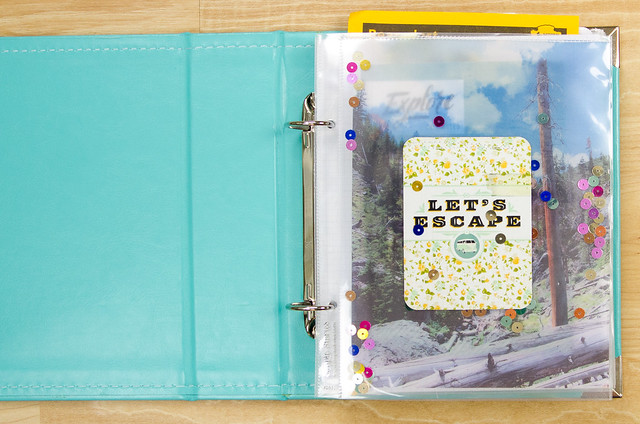
I also have a full 6x8 photo (from Yellowstone National Park during our first road trip) included as a secondary part of the title page. I printed the photo on vellum using our color laser printer (it's really old and we bought it from an office surplus), and I *love* how it turned out!
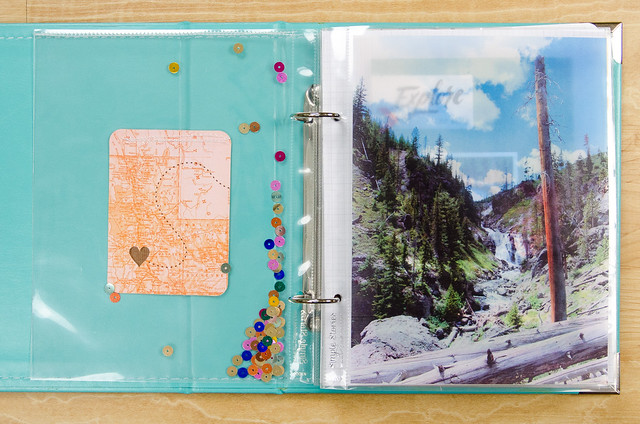
I couldn't believe it when I looked at the back of this journaling card and realized that it outlined part of our first trip- so cool, and of course I had to use it!
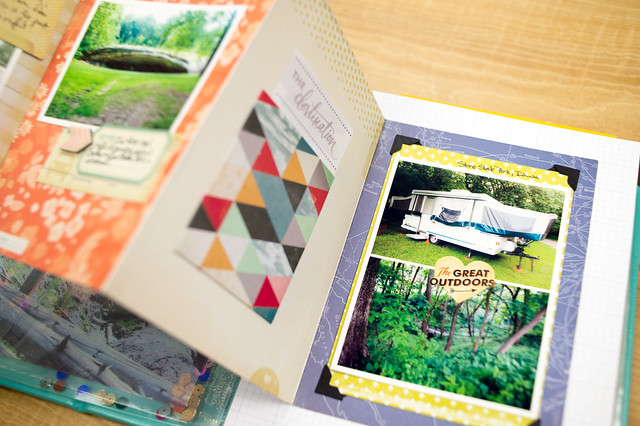
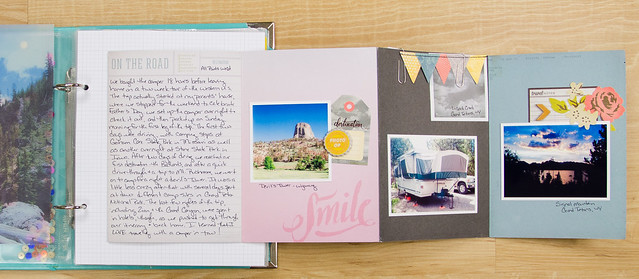
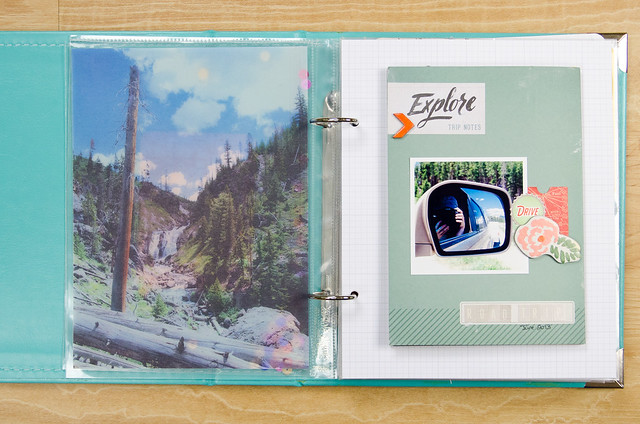
Since our first trip in our camper was an epic 2-week road trip out west, I decided to use the accordion album from the Open Road collection to document it. I wanted to record all of the places our camper had stayed, but I also only wanted to use up one page for the trip- especially since I already have a full 6x8 album dedicated to it! This album is more of a "places our camper has stayed" record than a vacation album.
I adhered the entire piece to a 6x8 page, and it can be folded out right in the album.
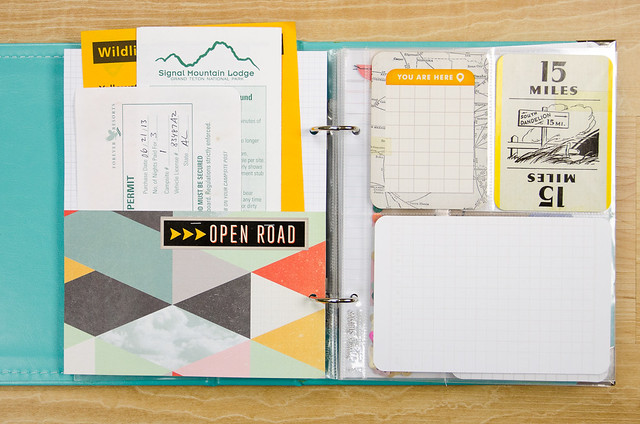
On the back of that page I used a piece of patterned paper to make a pocket and tucked some of the brochures and camping permits that we collected along the way.
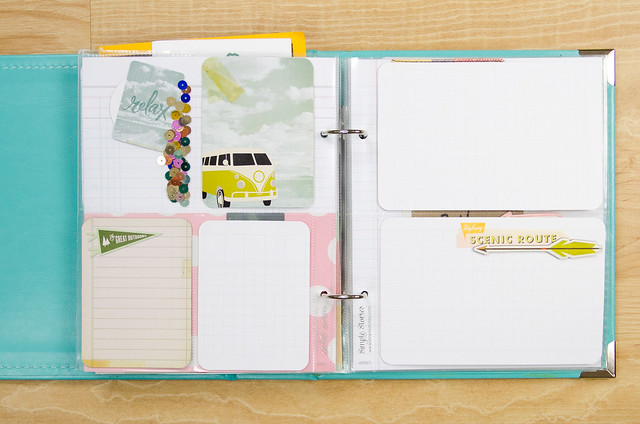
The rest of the album is full of empty areas waiting to be filled with photos, journaling, and ephemera from future trips, and I really need to get our camping trip to Disney World (my first time at Disney!) last spring added in.
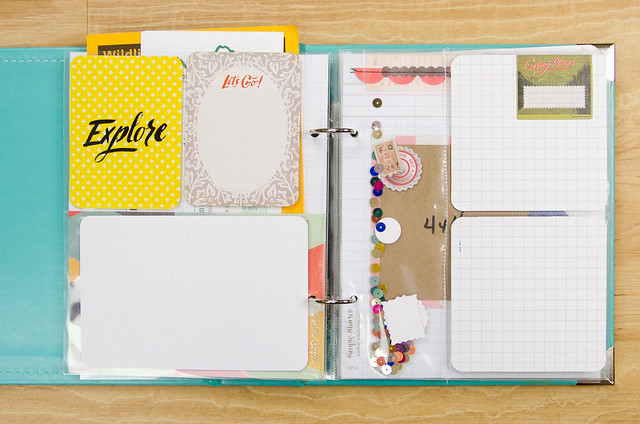
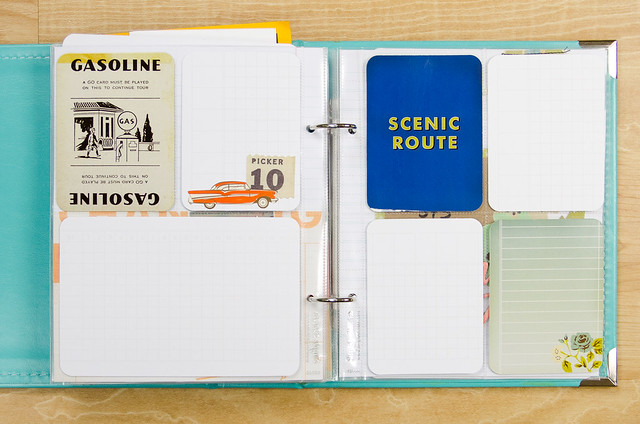
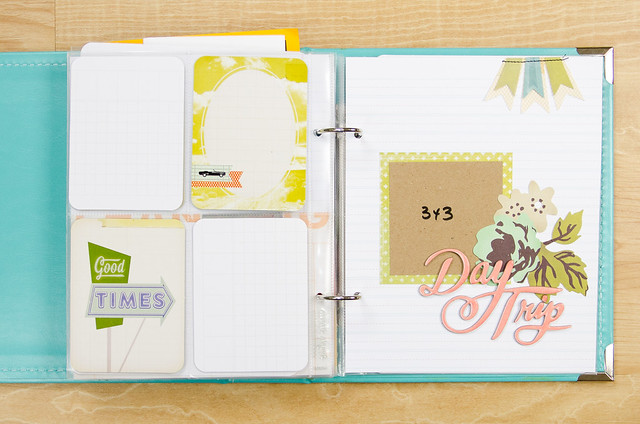
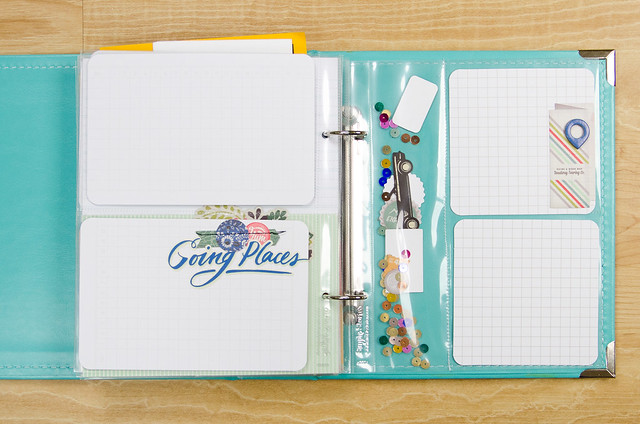
I used lots of Project Life grid cards as bases and added die cuts, stickers, and stitched border pieces from Open Road as embellishments. I also made a few full 6x8 layouts with spots ready to add photos in. The idea is that I will be able to quickly document a trip with just photos + words since the scrapbooking part is already finished.
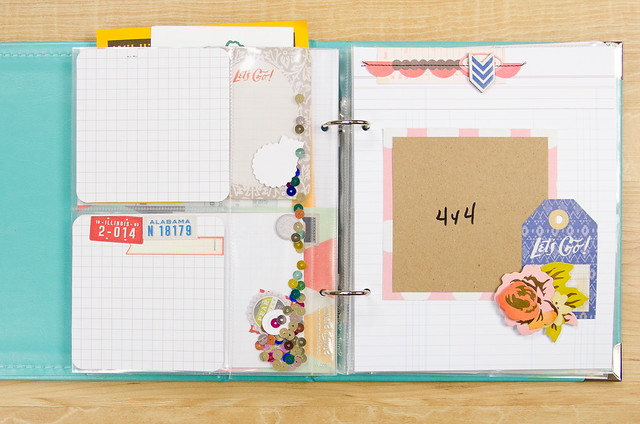
There are a few more pocket pages scattered in, too, and the pages can be taken out and rearranged as needed to suit the trip.
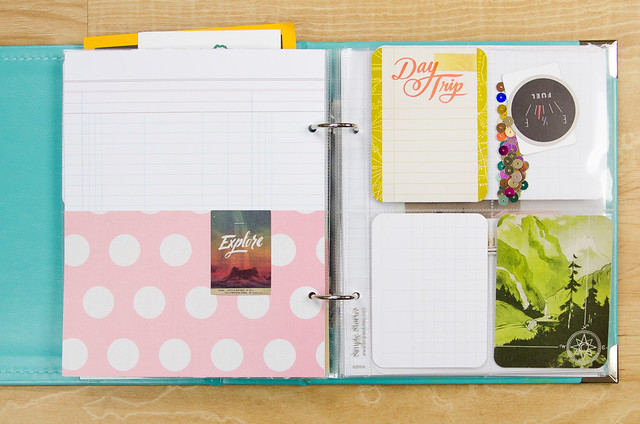
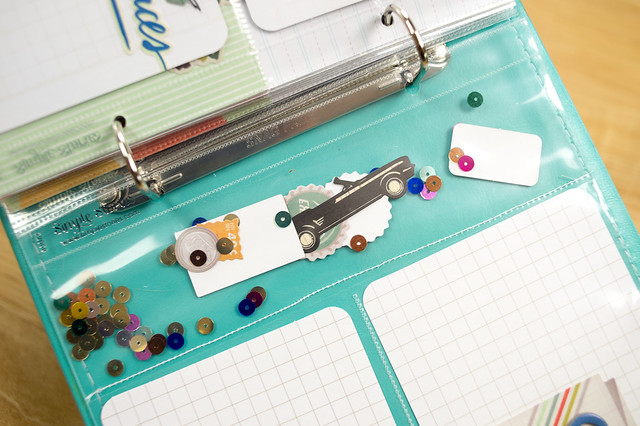
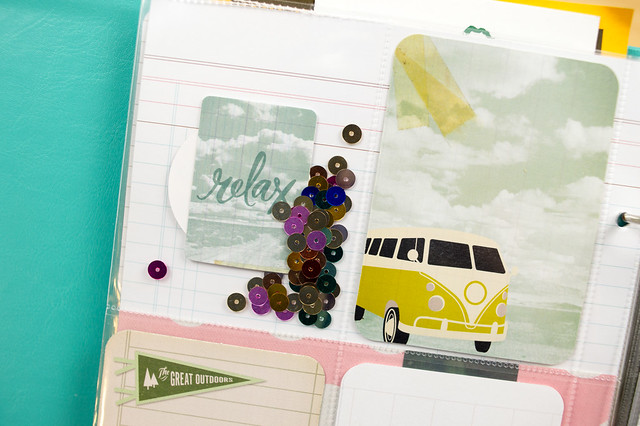
And can you tell I had some fun making sequin pockets, too?
Writing up this post has me longing for another road trip! It's possible that we'll be able to take one next summer, but since Darren won't have much of a break before M3 starts (and no break between M3 and M4), I'm not sure what those plans will be yet. Whatever they are, this little album will be ready and waiting!
Thanks so much for stopping by today! Hugs to you all!
If you are interested in the products that I used in this post, you'll find them linked up below. I do participate in affiliate programs and use those links where possible. If you make a purchase after clicking on one of these links I do earn a small commission, but it doesn't cost you anything extra. Some product that I use is provided to me in exchange for design work, and some of it I purchase. I will point out product that was provided to me when I use it.
6x8 Camper Album with Crate Paper's Open Road Collection
Thursday, July 30, 2015
Hello and happy Thursday, everyone!
Thank You!!
I wanted to take a minute to seriously thank you all for welcoming me back to blogging. It's been great seeing so many familiar names (and some new ones!) in the comments, and I appreciate all of you!
Trade Show/Sneak Peek Update
Before I launch into sharing today's projects, I also wanted to let you know that sneak peeks of the new fall and winter scrapbooking products are still being released by manufacturers. I was surprised to see new ones (like Amy Tangerine's new line with American Crafts) pop up after the PaperArts (CHA) show had ended, and then I realized that the majority of manufacturers were at the relatively new (I think it started last year) Sierra-Pacific Mixed Media show or had opted out of attending a trade show altogether.
I'm still gathering up all of the sneak peek and reveal links that I can find and am adding them to the 2015 Summer Sneak Peeks page.
New Cards
I am still admittedly not a great cardmaker, but ever since acquiring a set of Zig Clean Color Real Brush Markers (yes, they are all they're hyped up to be!), I've been having a blast learning how to color with them. I still have quite a ways to go, but I do have a card made with them to share today.

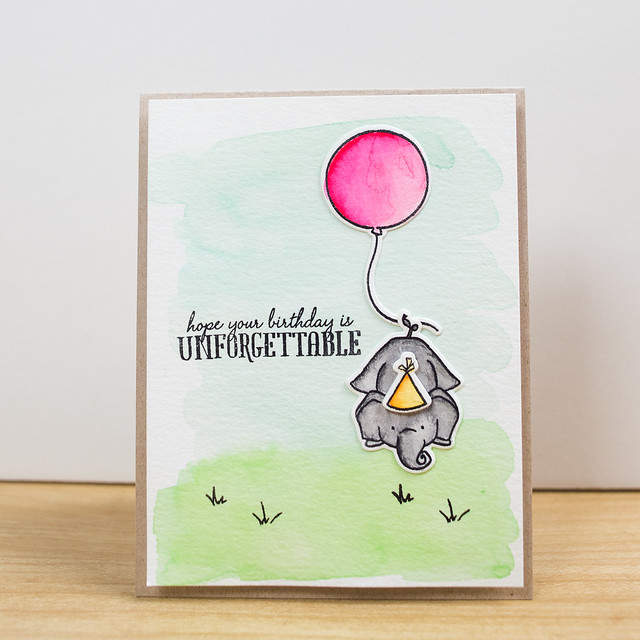
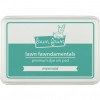
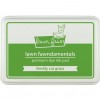
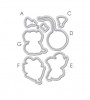
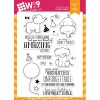
My niece, Sophie Clare, turned 5 a couple of weeks ago, and I pulled out my freshly-arrived markers and the Unforgettable stamp set by WPlus9 to whip up a birthday card for her. She has had a stuffed elephant name Eloise since she was a baby, so I thought she'd enjoy an elephant on her card. The elephant, hat, and balloon are colored with the Zig markers, and I used a wash of diluted dye ink (Mermaid and Freshly Cut Grass by Lawn Fawn) to watercolor the background. And then at the very end I managed to stamp the sentiment a little crooked. Doh!
I used Canson XL watercolor paper for both the background and the die cuts simply because it's what I had around, but I picked up some Strathmore 300 series paper on sale at Michaels a couple of days ago and think I may like it more (both brands are available at Michaels). The Strathmore seems to lend itself to a little smoother blending both in a single color and between colors, but I want to use it a little more before I declare that. Also, I am not an artist by any stretch of the imagination, so I really have no idea which paper to use for certain purposes.
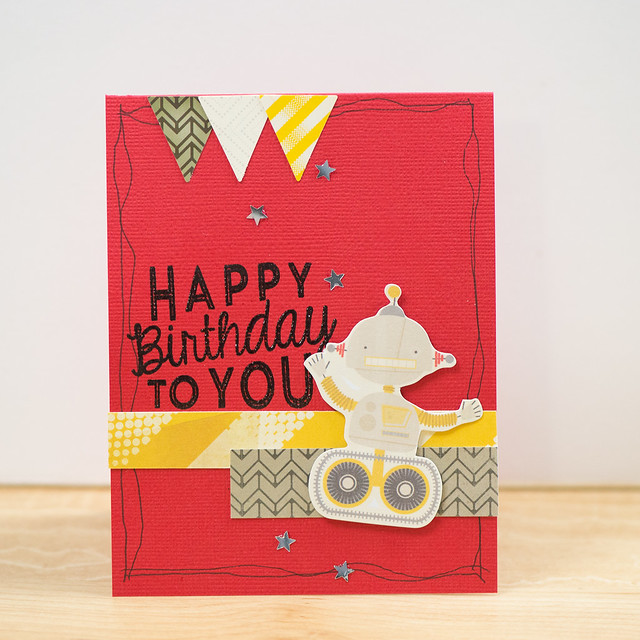
My second card is what I call a "scrappy" card (vs a "stampy" card like the one above) and was made for my nephew's (on Darren's side) birthday. He is a totally geeky kid who loves Doctor Who and anything science related, so I used some of Crate Paper's Boys Rule collection for his card.

I like to start a "scrappy" card with a large die cut or other embellishment as the focal point, and the robot from the Boys Rule die cut pack was perfect here. I filled the rest in with some paper strips, a few stickers, and some pen drawing around the edges before adding a sentiment stamp from Avery Elle to finish things off.
If you're interested in the supplies I used for either card, I've linked them up at the end of this post (affiliate links used where possible). Some items like the Crate Paper products are hard to find in stock now. I haven't shopped for physical scrapbooking supplies in a looooong time, so most of my stash is "well aged" at this point.
Layouts
I've found myself at the computer more than at my scrap table lately, so both of the layouts I have to share today are digital. There are definitely paper layouts in the works, I'm just waiting for my photo print orders to arrive (more on that in a bit).
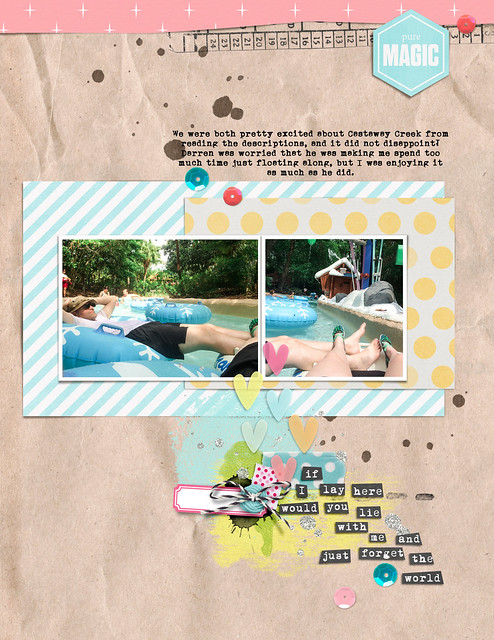
My first layout includes photos from the DisneyWorld vacation that Darren and I took last year (my first time at Disney!). We loved the theme parks, of course, but we also really enjoyed taking a couple of relaxation days during the week that were were there to just chill out at the water parks. Our favorite at both Blizzard Beach and Typhoon Lagoon? Cross Country Creek and Castaway Creek (and I totally used the wrong name in the journaling on my layout, but the beauty of digital is that it's easy to fix!). We spent hours just chilling on the "river" and enjoyed every minute of it.
All of the supplies for both of my digital layouts today are linked up over in my gallery at The LilyPad, so you can hop over there if you want to see more.
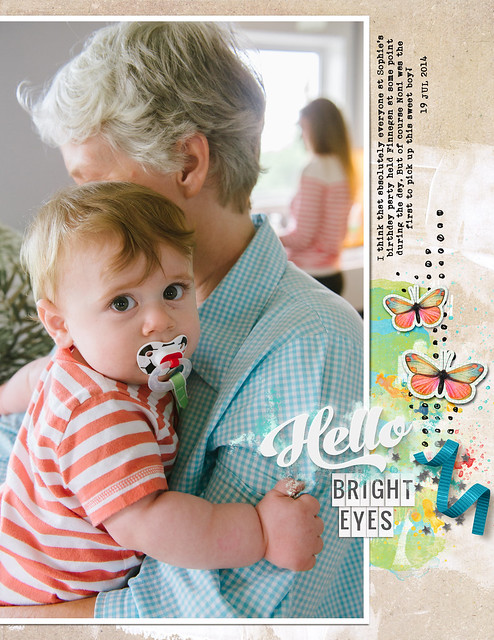
The Pad has pretty much become my digital home, and I find that the designs there really speak to my style. They also host some great challenges every month, and I've been finding that they're awesome for getting me started on a page when I'm not quite sure what I want to scrap. The page above was in response to a song lyric challenge (I used word art by Just Jaimee), and the page below was the result of a "Fill It Up" challenge. I always have a hard time using tons of patterned paper to fill a layout, but a photo enlargement? That I can do. Especially in digital, since I don't have to first procure an enlarged photo print!
That's my nephew, Finnegan (Sophie Clare's brother) at Sophie's birthday party last year. And since a reader (hi, Margot!) asked about how my niece and nephew were doing, I thought I'd share just a couple of photos from Sophie's birthday this year.
I can't believe that this girl is already five, especially since I've been blogging about her since the day she was born! She had her birthday party at her gymnastics school, and then she and her brother came home with my parents for the weekend- I got to spend lots of time with both of them!
Speaking of her brother, you've already seen his photo from last July, but this July? Oh, my!
Seriously, if he were any cuter, I would not be able to stand it!! He's a hilariously fun little bundle of energy and had just as much fun at Sophie's party as the big kids did!
And I have another birthday kid that I don't want to leave out- Mike!
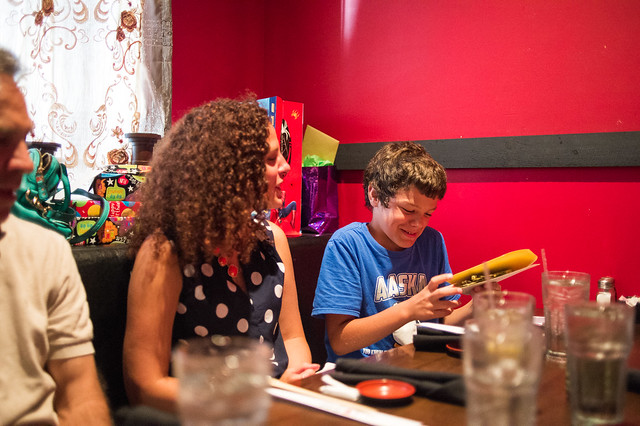
Mike was the recipient of the robot card (with some $$$ inside, of course!), and had his birthday dinner at a sushi restaurant. The rest of the family went on to see Jurassic World afterward at his request, though I politely declined that portion of the evening's festivities because I'd like to sleep again sometime in the next decade. I'm still not quite over being scared by Jurassic Park as a kid, and I'm sure the new one would give me nightmares! Darren said it was awesome, though. :)
Photo Printing
Okay, one last little thing, and then I'll quit rambling at you!
One of the reasons that I have struggled to make paper layouts for the last year or so is that I hadn't printed photos in a long time. Like, as in since the beginning of 2013, except for Project Life photos. I had a ton of pictures edited, but sitting down to plan out sizes to print for layouts had become such a chore that I just stopped doing it.
Earlier this week I decided to just chuck the whole "choose perfect sizes for each group of photos for each layout" mentality and just print everything at the same size. I know this is not a new or earth-shattering idea in the realm of scrapbooking by any means, and it's something that my crafty friend May Flaum has advocated for years. I actually have no idea why it took me so long to just go that route, but I finally did!
I am so excited to now have over 500 photo prints on their way to me, with each print containing two photos (putting two on a sheet was so easy to do using Lightroom and the method I blogged about a couple of years ago). I wasn't very selective in what I printed and mostly just uploaded everything that I had edited that wasn't something I shot specifically for the blog (like a scrapbooking project). My thinking is that it will be easier to choose from a stack of printed photos and immediately start scrapping than it will be to go through photos on the computer and the wait for them to be printed before I can make a page. I'm sure that many, many of those photos won't be used on layouts, but a bunch of them will probably end up in companion pocket pages alongside traditional layouts.
I printed all of my photos at 2.5 x3.5 (May prints hers at 4x6) for a couple of reasons. First, I generally like to use 2-3 photos on a page, and that size is perfect for that number of photos on an 8.5x11. Second, I'll be using baseball card page protectors as the companion pocket pages (again, because they're 8.5x11), and that's the perfect photo size to include in a pocket.
My photos were all ordered from either Snapfish or Shutterfly using some coupon codes they had available at the time. I like the print quality from both services, so it really comes down to who has the best deal when I'm ready to order. My favorite is when Snapfish has their "Penny Prints" sale, which just happened to be going on earlier this week. With shipping, each set of 99 prints was $6.88, or about 3.5 cents per photo (with two photos per sheet). That's an even better deal than the 100 free prints per month that they offer for the first year of using their app, which for some reason has higher shipping prices. For the same 99 "free" prints, the cost would have been $8.99 due to the higher shipping rate. I'll be sure to keep an eye out for future Shutterfly and Snapfish deals in the future and will post them here if you guys are interested in knowing.
The End (for today)
Thanks so much for hanging in with me for such a long post! I hadn't intended to talk about so many things at once, but the longer I waited to write the more things I kept adding to talk about!
I hope you all have a fantastic day, and thank you for taking the time to read here!
Supplies
If you're interested in any of the supplies used in the projects shown in this post, you'll find them linked below. I use affiliate links where available and, while I do receive a small percentage of sales that result from clicking on them, clicking on them will cost you nothing.
Thank You!!
I wanted to take a minute to seriously thank you all for welcoming me back to blogging. It's been great seeing so many familiar names (and some new ones!) in the comments, and I appreciate all of you!
Trade Show/Sneak Peek Update
Before I launch into sharing today's projects, I also wanted to let you know that sneak peeks of the new fall and winter scrapbooking products are still being released by manufacturers. I was surprised to see new ones (like Amy Tangerine's new line with American Crafts) pop up after the PaperArts (CHA) show had ended, and then I realized that the majority of manufacturers were at the relatively new (I think it started last year) Sierra-Pacific Mixed Media show or had opted out of attending a trade show altogether.
I'm still gathering up all of the sneak peek and reveal links that I can find and am adding them to the 2015 Summer Sneak Peeks page.
New Cards
I am still admittedly not a great cardmaker, but ever since acquiring a set of Zig Clean Color Real Brush Markers (yes, they are all they're hyped up to be!), I've been having a blast learning how to color with them. I still have quite a ways to go, but I do have a card made with them to share today.

My niece, Sophie Clare, turned 5 a couple of weeks ago, and I pulled out my freshly-arrived markers and the Unforgettable stamp set by WPlus9 to whip up a birthday card for her. She has had a stuffed elephant name Eloise since she was a baby, so I thought she'd enjoy an elephant on her card. The elephant, hat, and balloon are colored with the Zig markers, and I used a wash of diluted dye ink (Mermaid and Freshly Cut Grass by Lawn Fawn) to watercolor the background. And then at the very end I managed to stamp the sentiment a little crooked. Doh!
I used Canson XL watercolor paper for both the background and the die cuts simply because it's what I had around, but I picked up some Strathmore 300 series paper on sale at Michaels a couple of days ago and think I may like it more (both brands are available at Michaels). The Strathmore seems to lend itself to a little smoother blending both in a single color and between colors, but I want to use it a little more before I declare that. Also, I am not an artist by any stretch of the imagination, so I really have no idea which paper to use for certain purposes.
My second card is what I call a "scrappy" card (vs a "stampy" card like the one above) and was made for my nephew's (on Darren's side) birthday. He is a totally geeky kid who loves Doctor Who and anything science related, so I used some of Crate Paper's Boys Rule collection for his card.

I like to start a "scrappy" card with a large die cut or other embellishment as the focal point, and the robot from the Boys Rule die cut pack was perfect here. I filled the rest in with some paper strips, a few stickers, and some pen drawing around the edges before adding a sentiment stamp from Avery Elle to finish things off.
If you're interested in the supplies I used for either card, I've linked them up at the end of this post (affiliate links used where possible). Some items like the Crate Paper products are hard to find in stock now. I haven't shopped for physical scrapbooking supplies in a looooong time, so most of my stash is "well aged" at this point.
Layouts
I've found myself at the computer more than at my scrap table lately, so both of the layouts I have to share today are digital. There are definitely paper layouts in the works, I'm just waiting for my photo print orders to arrive (more on that in a bit).
My first layout includes photos from the DisneyWorld vacation that Darren and I took last year (my first time at Disney!). We loved the theme parks, of course, but we also really enjoyed taking a couple of relaxation days during the week that were were there to just chill out at the water parks. Our favorite at both Blizzard Beach and Typhoon Lagoon? Cross Country Creek and Castaway Creek (and I totally used the wrong name in the journaling on my layout, but the beauty of digital is that it's easy to fix!). We spent hours just chilling on the "river" and enjoyed every minute of it.
All of the supplies for both of my digital layouts today are linked up over in my gallery at The LilyPad, so you can hop over there if you want to see more.
The Pad has pretty much become my digital home, and I find that the designs there really speak to my style. They also host some great challenges every month, and I've been finding that they're awesome for getting me started on a page when I'm not quite sure what I want to scrap. The page above was in response to a song lyric challenge (I used word art by Just Jaimee), and the page below was the result of a "Fill It Up" challenge. I always have a hard time using tons of patterned paper to fill a layout, but a photo enlargement? That I can do. Especially in digital, since I don't have to first procure an enlarged photo print!
That's my nephew, Finnegan (Sophie Clare's brother) at Sophie's birthday party last year. And since a reader (hi, Margot!) asked about how my niece and nephew were doing, I thought I'd share just a couple of photos from Sophie's birthday this year.
I can't believe that this girl is already five, especially since I've been blogging about her since the day she was born! She had her birthday party at her gymnastics school, and then she and her brother came home with my parents for the weekend- I got to spend lots of time with both of them!
Speaking of her brother, you've already seen his photo from last July, but this July? Oh, my!
Seriously, if he were any cuter, I would not be able to stand it!! He's a hilariously fun little bundle of energy and had just as much fun at Sophie's party as the big kids did!
And I have another birthday kid that I don't want to leave out- Mike!
Mike was the recipient of the robot card (with some $$$ inside, of course!), and had his birthday dinner at a sushi restaurant. The rest of the family went on to see Jurassic World afterward at his request, though I politely declined that portion of the evening's festivities because I'd like to sleep again sometime in the next decade. I'm still not quite over being scared by Jurassic Park as a kid, and I'm sure the new one would give me nightmares! Darren said it was awesome, though. :)
Photo Printing
Okay, one last little thing, and then I'll quit rambling at you!
One of the reasons that I have struggled to make paper layouts for the last year or so is that I hadn't printed photos in a long time. Like, as in since the beginning of 2013, except for Project Life photos. I had a ton of pictures edited, but sitting down to plan out sizes to print for layouts had become such a chore that I just stopped doing it.
Earlier this week I decided to just chuck the whole "choose perfect sizes for each group of photos for each layout" mentality and just print everything at the same size. I know this is not a new or earth-shattering idea in the realm of scrapbooking by any means, and it's something that my crafty friend May Flaum has advocated for years. I actually have no idea why it took me so long to just go that route, but I finally did!
I am so excited to now have over 500 photo prints on their way to me, with each print containing two photos (putting two on a sheet was so easy to do using Lightroom and the method I blogged about a couple of years ago). I wasn't very selective in what I printed and mostly just uploaded everything that I had edited that wasn't something I shot specifically for the blog (like a scrapbooking project). My thinking is that it will be easier to choose from a stack of printed photos and immediately start scrapping than it will be to go through photos on the computer and the wait for them to be printed before I can make a page. I'm sure that many, many of those photos won't be used on layouts, but a bunch of them will probably end up in companion pocket pages alongside traditional layouts.
I printed all of my photos at 2.5 x3.5 (May prints hers at 4x6) for a couple of reasons. First, I generally like to use 2-3 photos on a page, and that size is perfect for that number of photos on an 8.5x11. Second, I'll be using baseball card page protectors as the companion pocket pages (again, because they're 8.5x11), and that's the perfect photo size to include in a pocket.
My photos were all ordered from either Snapfish or Shutterfly using some coupon codes they had available at the time. I like the print quality from both services, so it really comes down to who has the best deal when I'm ready to order. My favorite is when Snapfish has their "Penny Prints" sale, which just happened to be going on earlier this week. With shipping, each set of 99 prints was $6.88, or about 3.5 cents per photo (with two photos per sheet). That's an even better deal than the 100 free prints per month that they offer for the first year of using their app, which for some reason has higher shipping prices. For the same 99 "free" prints, the cost would have been $8.99 due to the higher shipping rate. I'll be sure to keep an eye out for future Shutterfly and Snapfish deals in the future and will post them here if you guys are interested in knowing.
The End (for today)
Thanks so much for hanging in with me for such a long post! I hadn't intended to talk about so many things at once, but the longer I waited to write the more things I kept adding to talk about!
I hope you all have a fantastic day, and thank you for taking the time to read here!
Supplies
If you're interested in any of the supplies used in the projects shown in this post, you'll find them linked below. I use affiliate links where available and, while I do receive a small percentage of sales that result from clicking on them, clicking on them will cost you nothing.
Thursday, July 16, 2015
I'm not sure if anyone still stops by here, but lately I've been feeling like doing a little blogging again and I wanted to pop in and say hello! Life has been crazy here, but good crazy. Darren finished his first year of medical school and loves it, and I'm still working full time writing software. On top of that, Star and Bee has continued to grow and is almost another full-time job on its own, and I love (I know, lots of love going on here) running it. I am probably insane for even thinking about blogging again, and hopefully you won't mind if posts are sporadic (probably very sporadic). It definitely won't be anything like the schedule I used to keep back in the day!
I did want to bring back one part of my "old" blogging habits, though- the CHA Summer 2015 Sneak Peeks!
I know, I know, it's called Paper Arts+ during the summer now, but out of habit I still call it CHA. :) I'm not quite caught up with finding them all yet, and some companies have gone to monthly or quarterly collections that blur the lines between CHA releases. Some collections listed may already be shipping, but they're all the most recent from each company. Also, I've been really out of the loop over the last year as far as releases go, since most of my focus has been digital- please forgive me if I'm a little rusty getting started!
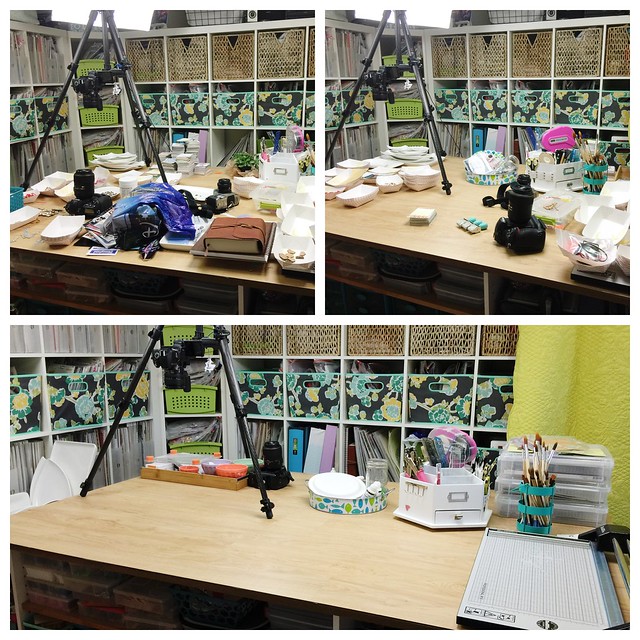
I've been doing mostly digi scrapping since the beginning of the year, mostly because my craft table was always taken over by Star and Bee and I had no space for paper! We've done some rearranging in the house, though, to make things better (honestly, we should probably just get a bigger house, but this one is paid off and I just don't want a mortgage payment right now), and recently my craft table went from a pile-o-stuff to usable again! I still have to keep the photography setup in place for business use, but I definitely have space to play now.
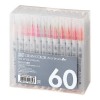
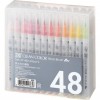
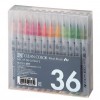
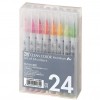
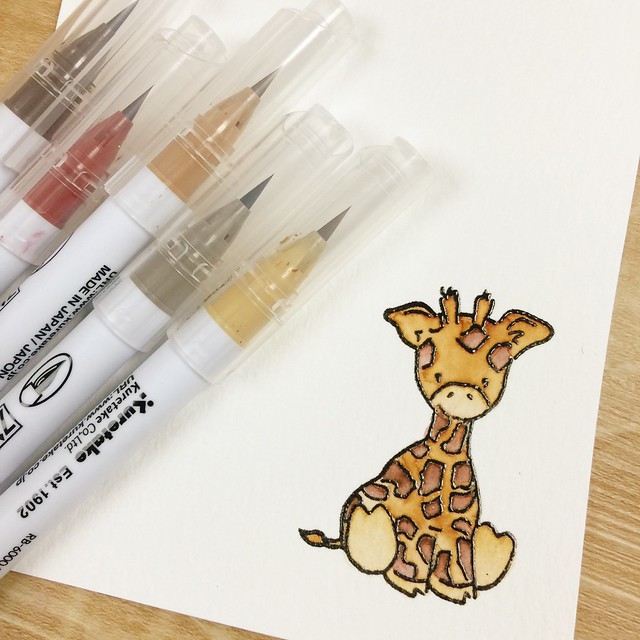
You'd think that the first thing I'd do after getting the scrap room cleaned up would be to make a layout, but somehow I fell straight into stamping. I blame Jennifer McGuire and her awesome video on the Zig Clean Color Real Brush markers. I never really took to using Copics (a friend of mine joked that it was because they actually require work), but I fell hard for these brush pens the very first time I used one. My only regret is that I bought the 36 pack and not a larger size (I would recommend at least the 48 pack for better color variety). They are so easy to use and get great results, which is perfect for someone like me with zero real artistic ability. Suddenly I'm rediscovering all of my outline stamps, especially the ones from my Lawn Fawn days, and also buying a few new ones like this adorable giraffe from the WPlus9 Party Animal set.
My scrapbooking has been a little sparse in the past year, but I've really been wanting to get back to it and have been working on getting my layout process down to a timeframe of about 30 minutes so that it's easier to work a page in here and there. A big part of that change was switching over to 8.5x11 for the majority of my pages. That's not to say that I won't bust out a 12x12 now and again (especially with a sketch from Scrapbook Generation), as well, but I really do love how quickly these little rectangular pages come together.
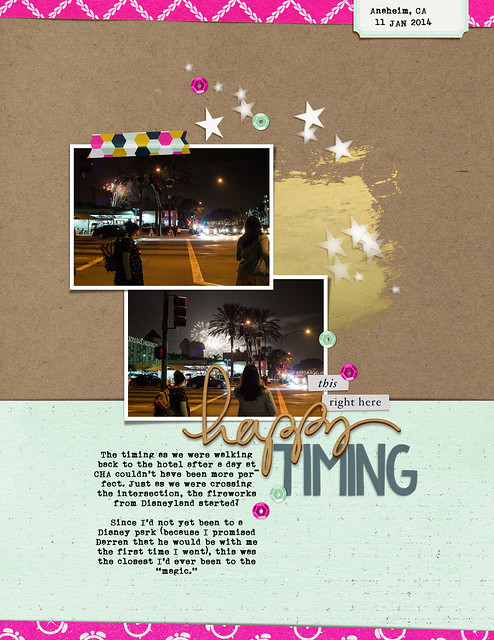
Here's a recent digital layout using supplies from the July BYOC at The Lilypad (you can find a full list of credits for it in my layout gallery over there):
I'm finding myself floating between digital pages, cards, and I even have supplies and the start of a couple of paper layouts on my table right now, too! I'll be sharing a mix of all of those things here as I have time, so hopefully you'll come along with me on this new, more relaxed, more balanced season of my crafting.
It's so lovely to be talking to you all again! Have an awesome day!
I did want to bring back one part of my "old" blogging habits, though- the CHA Summer 2015 Sneak Peeks!
I know, I know, it's called Paper Arts+ during the summer now, but out of habit I still call it CHA. :) I'm not quite caught up with finding them all yet, and some companies have gone to monthly or quarterly collections that blur the lines between CHA releases. Some collections listed may already be shipping, but they're all the most recent from each company. Also, I've been really out of the loop over the last year as far as releases go, since most of my focus has been digital- please forgive me if I'm a little rusty getting started!
I've been doing mostly digi scrapping since the beginning of the year, mostly because my craft table was always taken over by Star and Bee and I had no space for paper! We've done some rearranging in the house, though, to make things better (honestly, we should probably just get a bigger house, but this one is paid off and I just don't want a mortgage payment right now), and recently my craft table went from a pile-o-stuff to usable again! I still have to keep the photography setup in place for business use, but I definitely have space to play now.
You'd think that the first thing I'd do after getting the scrap room cleaned up would be to make a layout, but somehow I fell straight into stamping. I blame Jennifer McGuire and her awesome video on the Zig Clean Color Real Brush markers. I never really took to using Copics (a friend of mine joked that it was because they actually require work), but I fell hard for these brush pens the very first time I used one. My only regret is that I bought the 36 pack and not a larger size (I would recommend at least the 48 pack for better color variety). They are so easy to use and get great results, which is perfect for someone like me with zero real artistic ability. Suddenly I'm rediscovering all of my outline stamps, especially the ones from my Lawn Fawn days, and also buying a few new ones like this adorable giraffe from the WPlus9 Party Animal set.
My scrapbooking has been a little sparse in the past year, but I've really been wanting to get back to it and have been working on getting my layout process down to a timeframe of about 30 minutes so that it's easier to work a page in here and there. A big part of that change was switching over to 8.5x11 for the majority of my pages. That's not to say that I won't bust out a 12x12 now and again (especially with a sketch from Scrapbook Generation), as well, but I really do love how quickly these little rectangular pages come together.
Here's a recent digital layout using supplies from the July BYOC at The Lilypad (you can find a full list of credits for it in my layout gallery over there):
I'm finding myself floating between digital pages, cards, and I even have supplies and the start of a couple of paper layouts on my table right now, too! I'll be sharing a mix of all of those things here as I have time, so hopefully you'll come along with me on this new, more relaxed, more balanced season of my crafting.
It's so lovely to be talking to you all again! Have an awesome day!