friday favorites | may 31, 2013

Friday, May 31, 2013

Hello, and a very happy Friday to you all! It's going to be a busy weekend here for me with several things due and lots of personal projects on the to-do list, too! But I'm sure I'll squeeze in some crafty time, and I've rounded up the usual set of links for you just in case you're in need of a little inspiration for your own scrappy pursuits.

Enjoy!

ff may 31

From the top left:
  • Lisa Moorefield has reviewed several of the small-format albums on the market right now (Simple Stories Sn@p, Studio Calico Handbook, etc.), and wrote an amazing comprehensive post comparing them all. 
  • Ashli Oliver put a 6x6 paper pad to work on this fabulous layout!
  • I love all the pink + mint with a touch of gold in this baptism dessert table featured at Hostess with the Mostess.
  • Bananafish Studio offered up a free set of printable paperclip flags for National Scrapbooking Day, and also shares several ideas for making your own decorative paperclips.
  • Michelle Wooderson shared a fun idea for using patterned paper as inspiration for adding watercolor to your projects.
  • You can download this free set of printable chalkboard journaling cards from Paper Lovers Studio.
  • Learn how to make your own punched clay embellishments in a tutorial post by Jessica at Talk About Priceless.
  • iPhone users can download the free Days app, packed with features to help you maintain a visual diary, created animated GIFs from your iPhone photos, and more!
  • Mou Saha shared a lovely altered book at October Afternoon.

TTFN!

this month in my scrap room | may 2013

Thursday, May 30, 2013

This Month in My Scrap Room is based a regular series of posts by Sue Althouse, who graciously allowed me to use her idea on my own blog. Each month you'll find me documenting the little (and big) things that I'm working on to make my scrapbooking space more efficient so I can spend less time looking for things and more time playing with paper!

This month I've been dreaming lots of big things and taking lots of little baby steps in my scrapping space. Mostly I'm dreaming of building this big crafting table (though with this modification to make an even bigger work surface) with plans by Ana White. I also want to put the whole thing on cool looking casters. Did you know that there's an entire web site that sells nothing but cool casters? True story- www.coolcasters.com!

Mod-modular-craft-table-2
Image Credit: Ana White

It'll mean switching away from the Madison Trestle desk that I've been using for years (Mom says she'll give it a good home :) ), but I'm wanting to do more of my scrapping work while standing and have space to really spread things out (especially with the DIY FRED getting so much use now), so I think the change will be good for me!

I'd also like to move my computer off of my main scrapbooking surface and onto a very narrow desk across the room so that it a) isn't a distraction causing me to surf message boards when I really want to be scrapping and b) doesn't continue to get splattered with paint as I play. I think that a narrow desk like the one below (again, plans by Ana White) will work perfectly!

2x2-desk1
Image Credit: Ana White

I'd like to position the desk in a spot where I currently have two tall bookcases full of stamps and projects-in-progress, so I'm working on clearing those bookcases off (the revamped stamp organization I talked about last month is really helping with that) so that they can be moved out and the new desk installed. I'm taking it slowly and doing just little bits here and there for all of it so I don't get overwhelmed by it all. I'm currently going through old projects and deciding what I really will finish and what I need to just give up on.

Many of the concrete changes in my scrapbooking space this month are brought to you by the wonder that is the embroidery floss organizer box. Amy Tan showed how she was using a similar box to organize her veneers in one of her Project Life videos, and I love having all of these out of their packaging and easy to rummage through!

DSC_8732.jpg

I'm also using embroidery floss boxes to organize...embroidery floss! Imagine that! Like many other scrappers I find that I've recently been bitten by the hand-stitching bug, so I dug out my old boxes of DMC floss (plus a bag of random J&P Coats that someone once gave to me) and organized them all by color instead of the numerical order that I put them in oh-so-many years ago. I was an avid cross-stitcher when I was a kid and all throughout my teenage years, so I had quite the collection already without having to add a single new purchase. It was kind of like an insta-stash just waiting for me in my attic. :)

DSC_8736.jpg

There are also two more boxes in this collection, but you get the idea. :)

DSC_8734.jpg

One of the best things about the floss organizer boxes is that I didn't have to add any extra shelf space for them. I'm able to fit two of them into the dead space on top of my small embellishment color drawers- I'm pretty pleased with that!

DSC_8741.jpgDSC_8738.jpg

Speaking of the small embellishment drawers, that's an area that's getting slow-and-steady progress. Every once in a while I'll take 15 minutes and sit down with a few packages of embellishments, take the items out of the packages, and sort them into these drawers. I love how easy it is to find something that's pink or orange or aqua when I need it without having to continually flip through and open packages of mixed color embellishments. I absolutely detest opening and re-sealing packages, and it's amazing how much space is saved by simply tossing the packaging out!

DSC_8743.jpg

DSC_8744.jpg

My stamp and paper reorganization (I talked about those last month, too) are on a similar slow-track. Now that I have systems set up for both, I take just a few minutes every now and then to process a handful of paper or a few packages of stamps and am in no huge hurry to finish either task quickly. Little changes like that can totally happen slowly- I find that I stay more sane that way anyway! :)

There was of course some DIY FRED'ing and a little mixing of old and new stash going on around here, too, and I'm also curious to know what organizational tasks you've been up to lately! Chime in with a comment if you feel inspired- I'd love to hear about it!

back to the future | just the embellishments, please!

Wednesday, May 29, 2013

back-to-the-future-logo

Yes, I really am here with another installment of Back to the Future! It's been a long time since the last one, and if you're a new reader (welcome, and thank you!), this is a relatively new blog segment for me where I take a hot new scrapbooking collection and combine it with supplies from the archives of gone-but-not-forgotten favorites.

I also apparently like to see how many times I can use the word "new" in a single paragraph.

The last round found me taking an entire new collection and using it with an entire old collection, but this time I'm shaking things up a little bit. After 
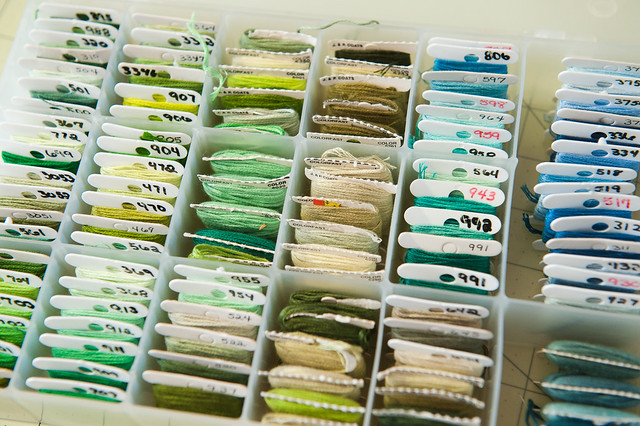
my last guest appearance on The Paperclipping Roundtable, I received lots of comments from people who were intrigued by my "just buying the embellishments" strategy for shopping for supplies. The theory is that I have lots and lots of paper, and I tend to be a B-side scrapper, anyway, as I found out while sorting my patterned papers by color last month, so I should be able to find ample basic prints in my scrap room such as dots, stripes, damasks, and grids, to coordinate with key embellishments from new collections. The idea is to buy just a few pieces- chipboard, journaling cards, tags, etc.- that carry the "feel" of a collection and then fill in the blanks from stash.

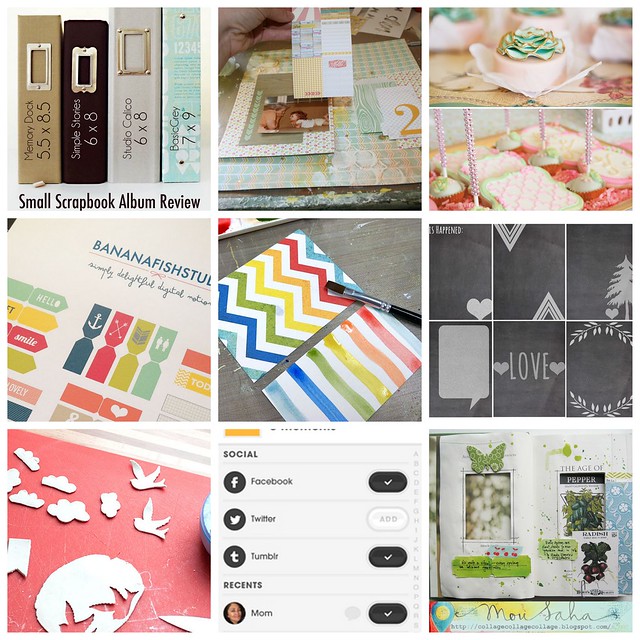
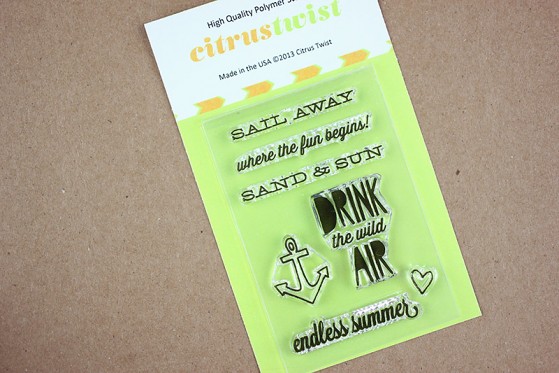
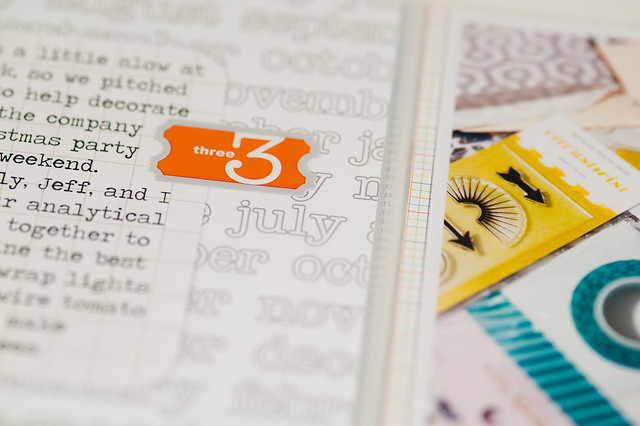
And, because I know I've been posting a lot of non-layout stuff lately (though I do love writing tutorials and sharing quick tips and tricks!), I promise that there is indeed a layout hidden in this photo-heavy post. In fact, here's a little peek at what you'll be seeing later!

DSC_9573.jpg

I've been trying to use my stash more this year and scale the shopping way back. It took me a bit to get into the groove of letting most of my new supplies come from my monthly design team kits at Citrus Twist, but I'm happy to finally be there and loving having the chance to finally get to some of those older pretties that are in my scrap room.

I do also get a small amount of credit from Two Peas each month, and that's where the new supplies in this post came from. I challenged myself to use that credit to get the items that most conveyed the look of the four new My Mind's Eye mid-release collections by ordering just the chipboard and cut apart sheets (I chop them up and use them like embellishments) from each and filling in the rest with my stash. I can't disclose just how much credit I get, but before that credit was applied my order was just over $26 after my 10% loyalty discount (which I'm sure I won't have much longer since I'm shopping way less than I did last year). I also pay shipping on orders when I use my Garden Girl credit. So, there you go- full disclosure. :)

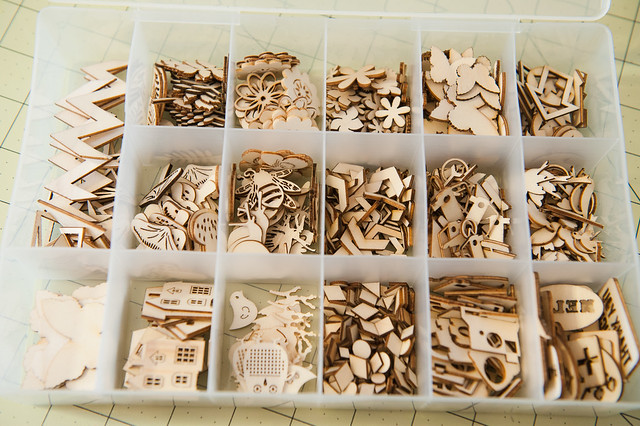
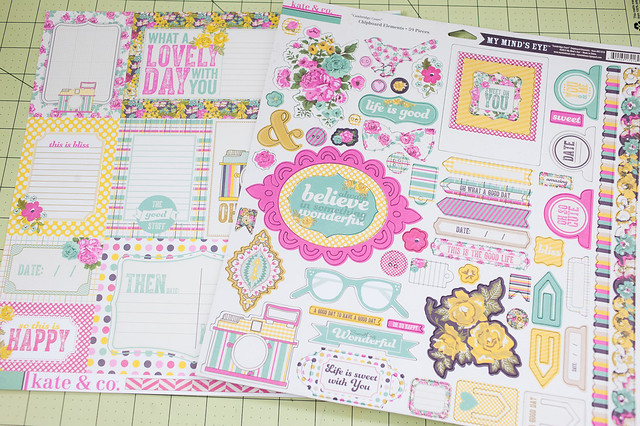
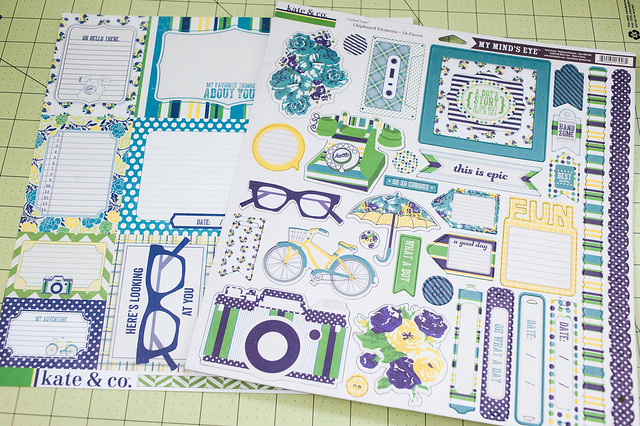
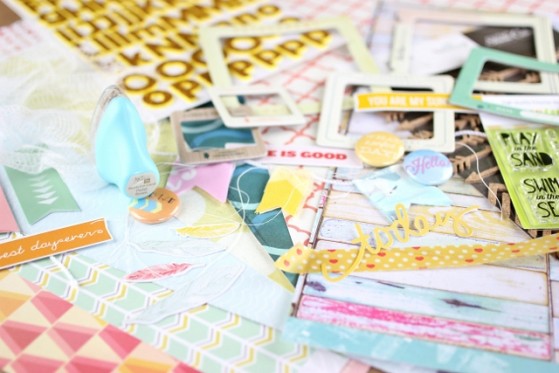
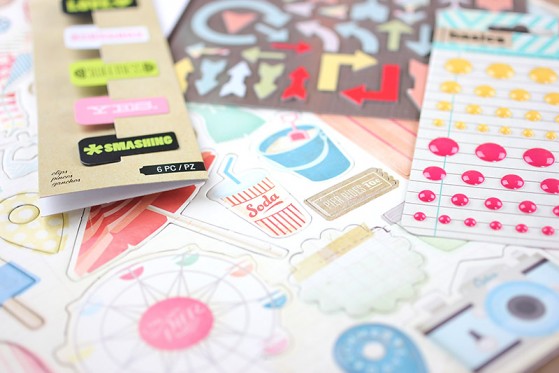
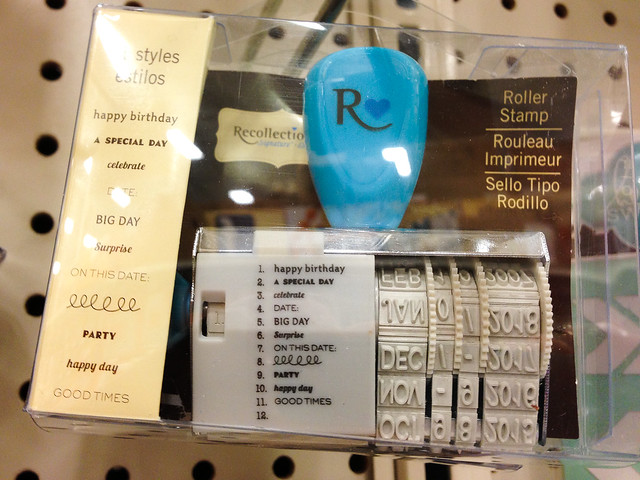
My box contained chipboard and journaling card papers for both of the Kate & Company colorways...

DSC_9535.jpg

DSC_9534.jpg

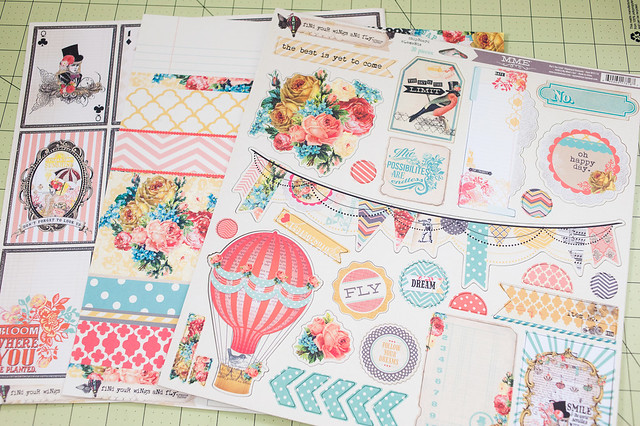
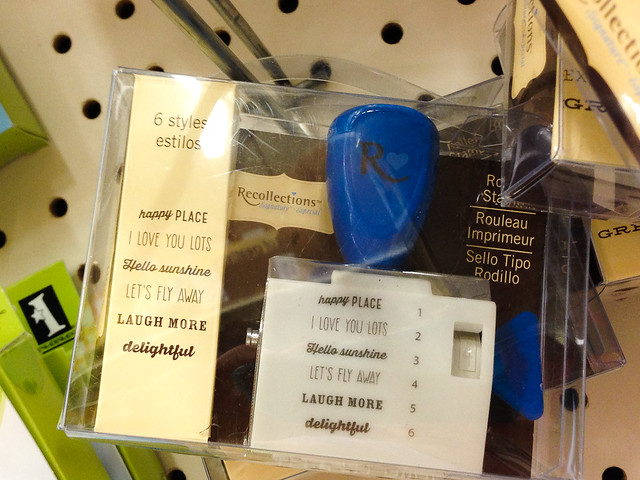
...along with the chipboard and two cut apart sheets for each of Rhonna Farrer's new Find Your Wings and Fly collection colorways.

DSC_9531.jpg

DSC_9529.jpg

It actually feels like quite a good amount of stuff for $26, especially when each of those chipboard sheets contains 50+ pieces. One 12x12 chipboard set will embellish a lot of layouts!

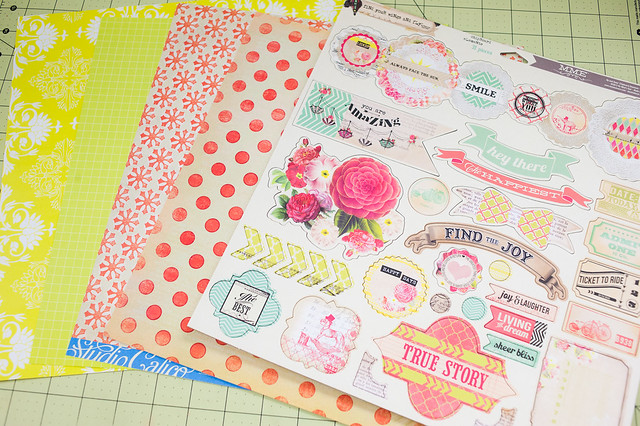
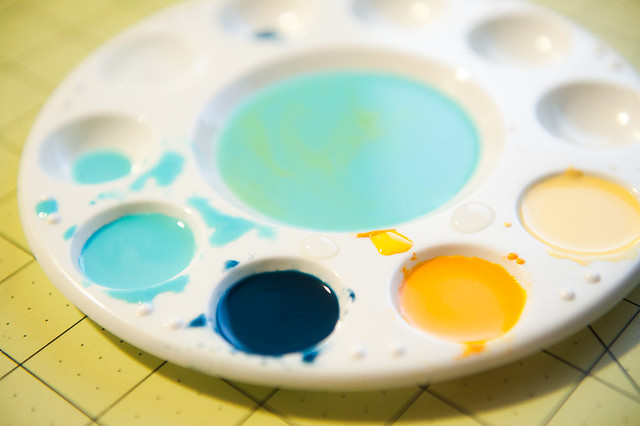
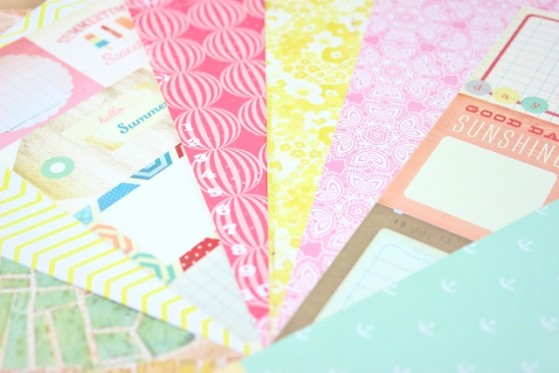
I decided to go with the Up and Away portion of Find Your Wings and Fly (the items in the photos above) for this installment of Back to the Future, and I spent about 10 minutes looking through my Cropper Hoppers of color-sorted papers for sheets to match. I didn't look for "perfect" matches, just whatever caught my eye as I flipped through the stack.

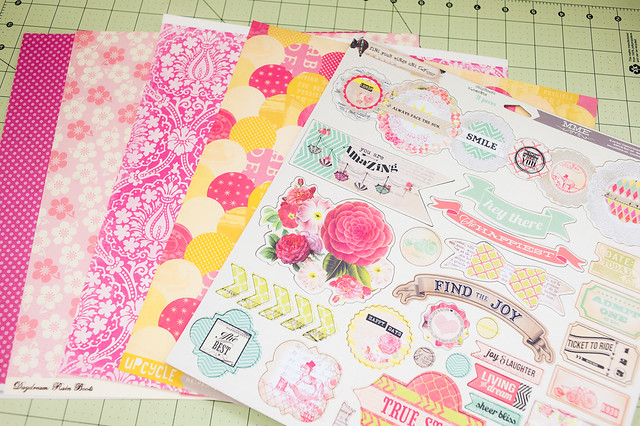
There were tons of pinks that would have worked, but I stopped myself after the first four sheets that I found. The papers are from the following collections, left to right: Lily Bee's Victoria Park, Daydream by October Afternoon, DCWV's Spring Fling Stack, and Upcycle by Cosmo Cricket.

DSC_9537.jpg

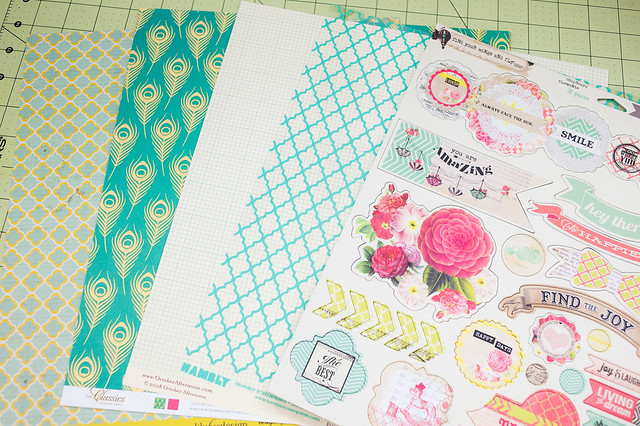
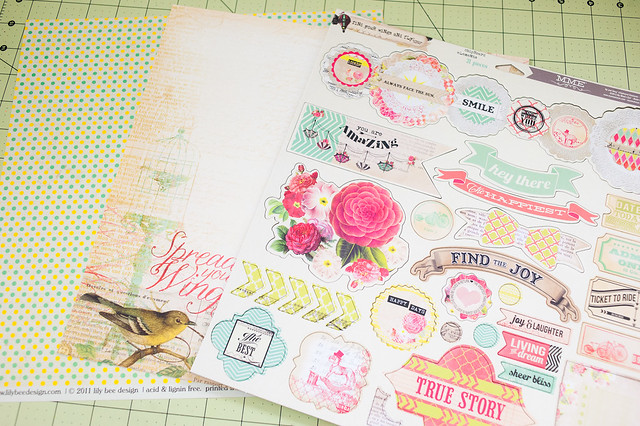
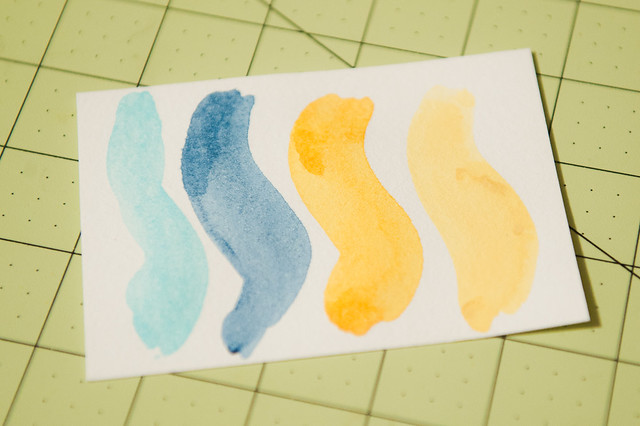
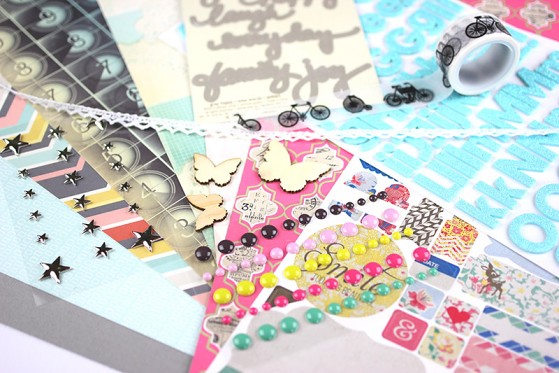
The teals were fun to go through, too! I found four papers here...well, three papers and one transparency. :) Lily Bee Memorandum, American Crafts The Classics, October Afternoon Detours, Hambly Screen Prints.

DSC_9539.jpg

There were small hints of a yellow-green and a red-orange color in the patterns, so I chose just a couple of papers representing each those colors, too. I think the first page is from a MAMBI pad from Michaels a few years ago, then from left to right there's a sheet from the Project Life Olive Edition paper, Studio Calico State Fair, and the My Mind's Eye Lost and Found 180 sheet paper pad from Hobby Lobby.

DSC_9540.jpg

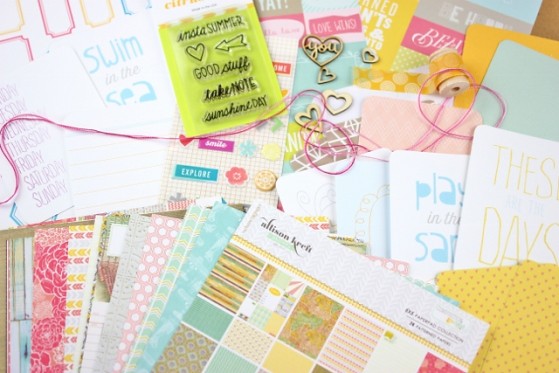
I also went through my "multi-color" stack (which is not as big as you might think!) and pulled out a couple of sheets that worked. From Lily Bee Memorandum and the My Mind's Eye Lost and Found 180 sheet paper pad.

DSC_9544.jpg

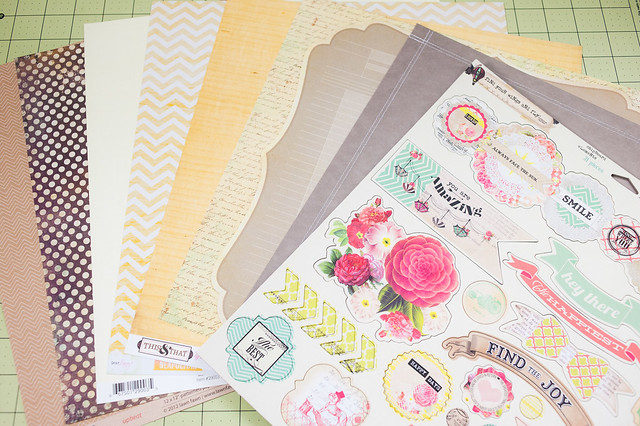
Last, I dove into my neutral papers and picked out a few for backgrounds and layers. Lawn Fawn's Bright Side collection, Stella and Rose by MME (from the rebranded Recollections paper pad at Michaels), Chatterbox Woods Fern, Dear Lizzy Neapolitan, Echo Park This & That, MME Lost and Found (again), Studio Calico, and a sheet of Amy Tangerine (the original collection) stitched paper that I've been hoarding for a while.

DSC_9543.jpg

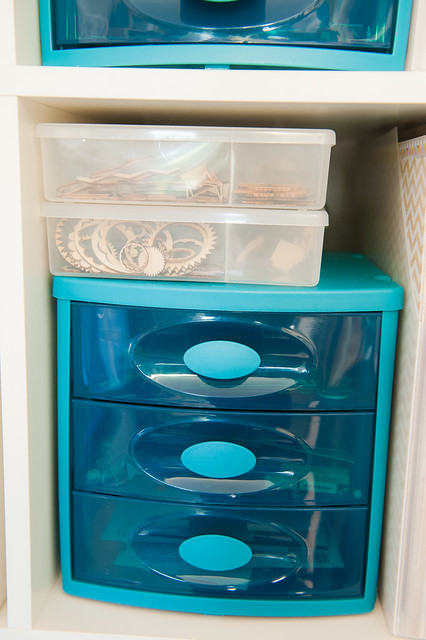
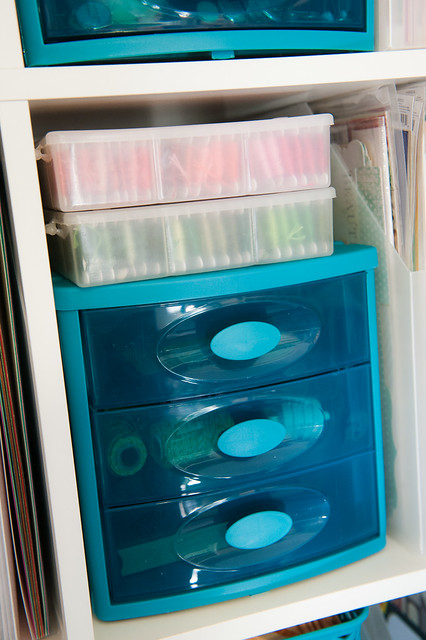
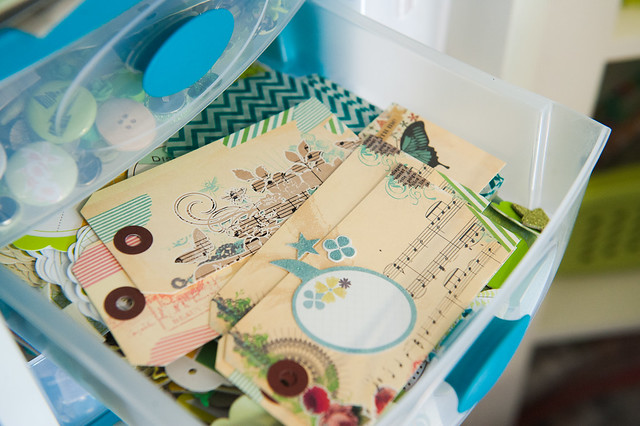
Obviously all of these papers won't get used on one layout, but I'll be keeping them together with the Find Your Wings and Fly chipboard and cut-apart sheet as a "kit" of sorts. I kept things simple and didn't pull out any embellishments (besides the chipboard I'd purchased) to go with these. I already store my embellishments, journaling cards, and washi tapes by color and will be able to find a match for these papers easily enough as I'm working on a page. Besides, it's easier to store the flat stuff all together in a Cropper Hopper and let the lumpy items stay in their drawers.

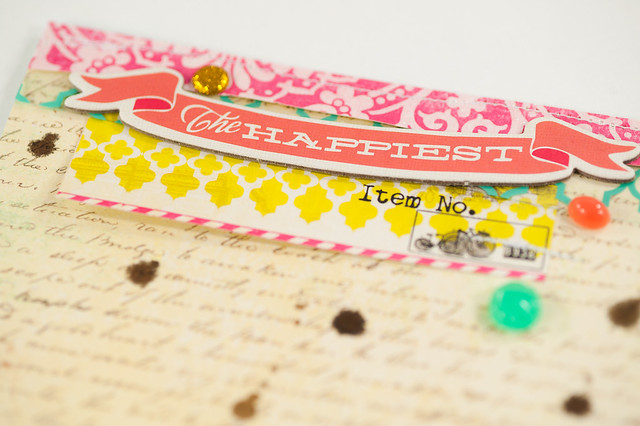
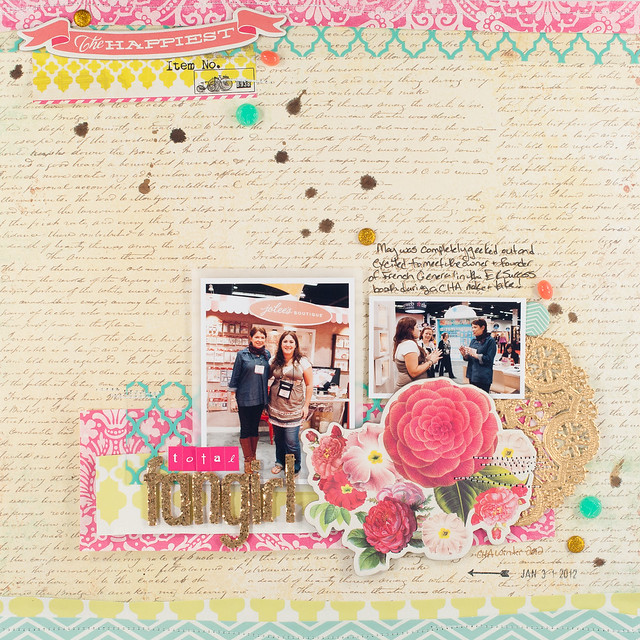
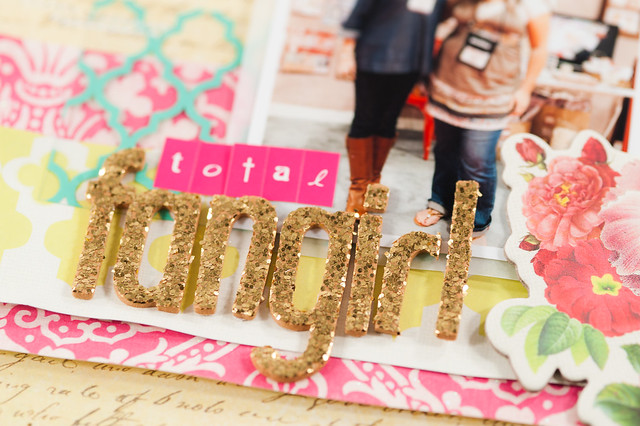
And here's the layout made with this cobbled-together kit!

DSC_9891.jpg

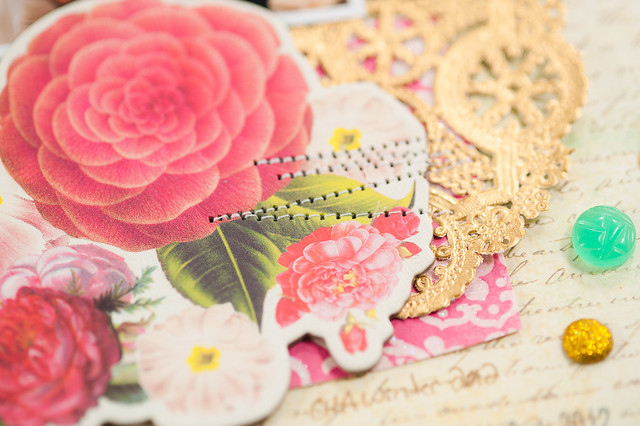
I started with my two photos, the really big floral chipboard piece from Find Your Wings and Fly, and the gold doily, then just started adding strips and bits from there until I was happy with it. Looking at it now that text print background might be just a bit too busy, but it just fit so well with the theme of the page that I wanted to use it. May was totally geeked out to meet the founder and owner of French General at CHA, so I made sure to use several of the French General embellishments by Jolee's on the page, too.

DSC_9570.jpg

The gold glitter Thickers from the Maggie Holmes collection are the only other "new" item I used on the page, and the one pack I have is getting so close to the end that I counted it as stashbusting, anyway. I totally had to cut some letters apart to make the "a" and "r"!

DSC_9572.jpg

I'm planning on making similar kits and layouts with the other three embellishment sets that I purchased and will be sharing them here when get to them. I'm not sure when that will be, but this little exercise has helped me realize just how far a small set of new supplies can go, and I'm excited to dive back in and try the next one!

quick tip : making watercolors with inexpensive acrylic paints

Tuesday, May 28, 2013

My little fling with cheap acrylic paints (you can see how I used them to make neon mists here and more experiments with mist-making here) took an interesting turn recently when I started wondering about watercolors. Both Peerless Watercolor Papers and Inktense Watercolor Pencils have been popular lately for scrapbookers looking to buy their first watercolor sets to play with, but I really didn't want to spend lots of money (both options are a bit pricey) for something that I would only use on layouts every once in a while.

And then I started thinking about those inexpensive little bottles of paint that I've been buying on sale recently and using to make color mists...and, let's face it, just because I like them. :) I picked these up for .89 a bottle at Michaels minus a 15% off a total purchase coupon a couple of weeks ago, using the palette from Crate Paper's The Pier as a shopping guide.

DSC_8731.jpg

As I was thinking, the logic went a bit like this...if acrylic paints can be watered down to make spray mists, and if scrapbookers often water down their spray mists to use as watercolors, does it then stand to reason that acrylic paints can be watered down enough to use as watercolors?

The short answer is, yes, they absolutely can!

DSC_8710.jpg

When I mixed this tray up, I squirted a dab of paint into each well and then used a brush to mix with plenty of water. Even that little bit of paint was almost too much, though, and I later found that using the brush to get just a tiny bit of paint from the bottle and mixing it into a well of water was a much better way to go.

DSC_8678.jpg

You can see in the photo below that you definitely get a watercolor look with this technique with some areas of pooling where the color is a bit darker. Love that. One way they differ from traditional watercolors, though, is that you can't go back in with a wet brush and move the color around after it's dried- once it's down, it's down, but I can definitely live with that difference, especially when it means that I don't need to buy yet another art medium for my scrapbooking (yay for multitasking!).

DSC_8698.jpg

Oh, and the reason I used The Pier as inspiration for the paint colors in the first photo? Because the June kits from Citrus Twist are full of this collection (and many more)! Sneaks of the kits were released yesterday, and I wanted to quickly share them here before I dash off for the day.

Main Kit - "Boardwalk"

June_Main_Sneak_640x427_

Project Life Kit - "Sunshine Day"

June_PL_sneak_640x427_

Embellishment Kit - "Ferris Wheel"

embellie_sneak

Patterned Paper Kit - "Hello Summer"

June_pattern_paper_640x427_

Add-On Kit - "Charming"

Add_on_sneak

Stamp Add-On - "Endless Summer"

Note: The stamp add-on is new this release. In order to give more people a chance to get the Add-on kit stamp, Citrus Twist removed it from the Add-On kit and made it available as its own add-on. Main and Project Life kit stamps will still be exclusive to those kits. 

June_stamp_add_on

Have a lovely Tuesday, everyone!

project life 2012 | week 49

Monday, May 27, 2013

This was one colorful week, both photo and paper-wise! With photos from Christmas trees at work, home, and on a Christmas tree walk in town, not to mention that bright wrapping paper from Target, I wasn't sure which color scheme to go with here, so I chose all of them!

project life 2012 week 49.jpg

Supplies:


I already had the Take Note collection by Doodlebug out on my desk when I started this page since I'd just finished using it on this layout for Two Peas, and since those colorful rainbow bits didn't really have a chance to shine on that page, I thought I'd give things another go using just this bright collection and not mixing it with anything else. I'm not sure that it actually matched anything here, but it certainly was fun to use!

DSC_9797.jpg

DSC_9798.jpg

DSC_8097.jpg

DSC_8094.jpg

DSC_8096.jpg

There's only one layout in my 2012 album that still isn't scrapped- the week of Christmas. And, honestly? I'm not feeling the Christmas vibe at the moment, so I'll wait until the mood strikes to work on it. I made a deal with myself when I got back into Project Life to not worry about being behind on Project Life, ever, and so far, so good, more than a year and a half later. Being caught up is seriously overrated! :)

geek girl | may 26, 2013

Sunday, May 26, 2013

It's been a bit of an exciting week for Star Wars fans! There's a new animated series in the works and the debut of a new animated miniseries coming up, which should help ease the sting of losing The Clone Wars.

Lego Star Wars: The Yoda Chronicles premieres this Wednesday and is the first in a three part series. You can read up on all the details at TV Guide and check out the video trailer below. I'm totally on board for this- it looks to carry the same dry humor as the awesome cut scenes from the Lego Star Wars video games and should be quite entertaining.


The new animated series, Rebellion, was announced this week, with Dave Filoni and an assortment of other talent from The Clone Wars will be on board for production. The series will be set between Episodes III and IV (The Clone Wars was set between Episodes II and III). Big Shiny Robot has more details along with the full press release, and you can watch a short video clip below.


And now for the usual geeky picks! Today's roundup is so full of cakes, cookies, and other assorted sweets that you very well might need to brush your teeth after reading.

Enjoy!

gg may 26

From the top left:
And, for a little video sweets goodness, check out this video showing how to make your very own rainbow My Little Pony cupcakes.


MTFBWY!

friday favorites | may 24, 2013

Friday, May 24, 2013

Hello, and a happy Friday and start of the Memorial Day weekend to you all!

Today at my little casa we're starting things off with family around- my brother, his wife, and their daughter stayed with us overnight as a stopover on their drive to a weekend beach vacation- and then the rest of the weekend is slated for staying home, chilling out, working on the yard, and for me some crafty fun!

I've got the usual selection of scrappy and crafty picks to share with you today, so let's get things started, shall we?

ff may 24

From the top left:

  • Scoring boards are not only great for making card bases, they can help add some texture to your cards and layouts, too! Learn more at SEI Lifestyle.
  • I always love Monika Wright's mini albums, and her April installment at My Mind's Eye filled with 49 lists to be completed during her 49th year out is simply amazing!
  • Katie at Punk Projects turned some random discarded bricks into literary-themed (and geeky!) garden decor. 
  • Jessica at Talk About Priceless walks readers through the construction of one of her layouts from start to finish.
  • I went back and forth over whether this pick should go in Geek Girl or here in Friday Favorites, but it was definitely going to go somewhere! I'm more than a little hooked on How I Met Your Mother, and I love this party at Hostess with the Mostess styled after the series.
  • Learn how to make your own paper globe (with a link to a free printable and instructions) at How About Orange.
  • I absolutely adore altered books, and this lovely album by Katie Ehmann for Crate Paper certainly caught my eye.
  • My Sister's Suitcase shows how to use your phone to print Instagrams, photo collages, and more at any regular developer using your iPhone. 
  • Ashli Oliver made a gorgeous artsy journal, ready to be taken on her upcoming beach vacation to document all the fun!
TTFN!

new heidi swapp masks and recollections roller date stamps at michaels

Thursday, May 23, 2013

Michaels seems to have really leveled up their merchandising efforts in the scrapbooking department lately. Just six weeks or so after posting about the massive influx of new product from major manufacturers like Simple Stories and My Mind's Eye, I'm back with another set of pictures, this time of some new Heidi Swapp masks and Recollections date and phrase stamps.

I first learned about the Heidi's new masks on her blog, and I didn't really expect the Michaels closest to my office (the older one in town that is sooooo slow to get new items in) to have them yet, but I was pleasantly surprised to discover that they were indeed there! My store had them in the regular scrapbooking aisles (with the rubber stamps) and not on an endcap or in the special display with the other Heidi Swapp products, so you might have to poke around a bit to find them.

IMG_4448.jpg

There are sixteen masks in the new collection- eight 12x12 (priced at $5.99) and eight 6x6 (priced at $3.99). I had my trusty iPhone in hand and took pictures of them all, starting with the 12x12 masks:

IMG_4449.jpgIMG_4450.jpg

IMG_4451.jpgIMG_4452.jpg

IMG_4455.jpgIMG_4457.jpg

IMG_4458.jpgIMG_4459.jpg

The 6x6 masks are all unique designs, rather than being scaled-down versions of the 12x12 masks.

IMG_4465.jpg

Here's a closer look at the eight 6x6 masks, starting with my favorite- the confetti template that gives you the choice of hearts, stars, or circles.

IMG_4466.jpgIMG_4467.jpg

IMG_4469.jpgIMG_4470.jpg

IMG_4471.jpgIMG_4473.jpg

IMG_4474.jpgIMG_4475.jpg

I happened to look over to my left as I was taking these photos, and what should I spot right next to the masks but the new Recollections branded roller date stamps? Many of the phrases on the first two are very similar to the Dear Lizzy Neapolitan and Studio Calico Classic Calico 3 date stamps that have been out for a while, but the years on these do go back to 2007 as the others were originally intended to do. If you didn't pick up the originals because of the year issue, you might want to hunt these down!

IMG_4461.jpg

IMG_4482.jpg

This birthday themed stamp looks to be original (I can't think of any previous collections it matches, at least), so it came home with me.

IMG_4479.jpg

A pair of roller phrase stamps has also joined the Recollections lineup. The first stamp pictured below has several phrases in common with the Dear Lizzy Lucky Charm stamp released at CHA Winter 2013, but the one below it looks to be mostly original.

IMG_4464.jpg

IMG_4483.jpg

I did pick up a few of the Heidi Swapp templates and have been busily playing with them in my scrap room over the last few days. I hope to have a layout or two to share soon!
CopyRight © | Theme Designed By Hello Manhattan