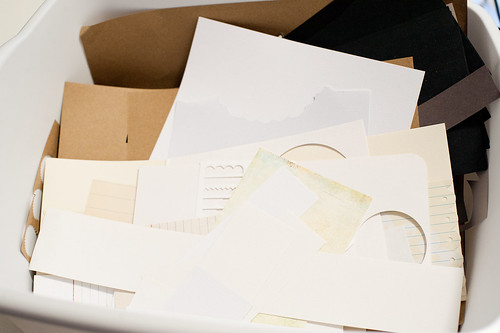
Today we're going to start off with that pile of neutral scraps that I mentioned you might want to get together yesterday. You know all those little bits of white, kraft, gray, and black that you just couldn't stand to throw away? Today we're going to find a use for them in our Project Life albums!
Now, if you don't do Project Life, please don't tune me out, because in reality the stuff that we're going to make today can be used on any layout. I just tend to have Project Life on the brain always (obsessive? me? never!), and am constantly looking for new stuff to include in my album.
I actually talked a bit about this idea in a post I wrote for Celine Navarro's blog a couple of months ago. In that post I didn't focus so much on using up scraps as I did on creating basic elements that could be cut in bulk in one sitting and then stashed away for use on future layouts. So today we're going to concentrate on doing just that, but with out scraps!
I'll start off with the manual die cutting version of this project, since I've been positively itching to pull out one of my favorite Papertrey Ink stamp and die sets lately and play with it. The Label Basics stamp set and coordinating dies are probably one of the most versatile sets that Papertrey has ever produced, and it was actually one of the first sets I purchased from them. Those labels, they're a gateway drug, I tell you!
Papertrey also makes a smaller stamp set called Little Labels that contains three small-ish vintage style label frames along with a variety of stamps that allow you to add both borders and sentiments to your die cut pieces, making them perfect for cardmakers. There's not as much variety in label size and shape with these, but the set is also a bit less expensive than Label Basics.
The great thing about these sets is that they allow you make as many of those oh-so-cute vintage-style labels in a variety of sizes and in any color that you want (and have have stamp ink for), so the possibilities are truly wide open. I find it best to use mine in longer mass-cutting sessions, though, rather than hauling out the die cutting machine every time I need a label. So out came my dies and Big Kick, and after some cutting (while watching far too many episodes of How I Met Your Mother on Netflix), I ended up with this pile of labels all ready to be stamped with the correct color. I'm going to leave most of them blank for now and just stamp as I need them, though, so I can make sure to use a shade of ink that matches my project.
I realize that particular project revolves around a very specific set of products, but really it's extensible to so many different tools. I'm sure that if you raid your supply of stamps, you'll come across similar label stamps in your own stash, and those are easily stamped and hand-cut around with fine-tipped scissors. In just a few minutes of rummaging around in my own stamp collection, I found several sets that have label-style shapes in them that would be easily cut by hand. While one or two of these sets were purchased new, the majority have come from clearance sales, manufacturer warehouse sales, and trips to Tuesday Morning's, Big Lots', and TJ Maxx's scrapbooking sections (where stamps are usually just $2-$4 a set), so this is definitely a project that can be done on a budget!
Or perhaps you have some dies in your scrap room that are label-like in shape, and you can use those to cut your scraps and then doodle or draw in the colored borders. And if you have an electronic die cutter such as the Silhouette, you can certainly use that, too.
Speaking of the Silhouette, I've got a couple of recommendations for bulk cuts that you can make with it, too, and put up to use on your layouts later. Lisa Truesdell has an excellent tutorial here on making speech bubbles with the Silhouette, and those are always cute on both Project Life and traditional layouts. A quick look at Loni Stevens' section of the Silhouette store also reveals some amazingly versatile cut files- her 3x4 and 4x6 Project Life cards are perfect for any kind of layout!
I chose the second option to use up some of my pile of kraft and gray scraps (the Silhouette software makes it very easy to place cuts on just the portions of the mat covered by your scraps, as I did in the photo above), and ended up with this great set of die cuts all ready to be used on my next project. And, if you don't have a Silhouette or similar electronic cutter, you can again certainly adapt this to whatever tools you have on hand. Perhaps you'll want to pull out some larger background dies or embossing plates and make ready-made textured pieces to have on hand, or maybe you have some larger solid dies that will do the trick. The point of all this is simply to make something recognizable from your scraps rather than having a bunch of oddly-sized bits of paper hanging around.
So that's how I used up some of my neutral scraps for Project Life, but what about all those colored 3x4 and 4x6 pieces that I showed in yesterday's post? They'll turn up on a Project Life layout later today, and I'll also show you a simple trick for pulling a coordinated look out of what is probably a very disparate array of both old and new papers from many different lines.
See you then!
Supplies (click on images for product links):


