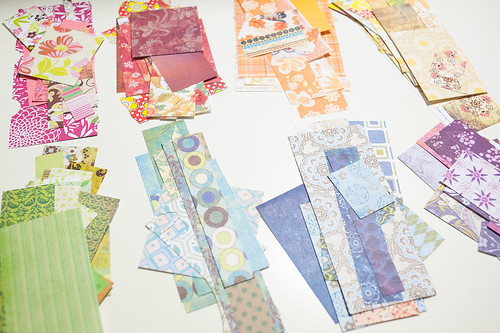
We've been working through our scraps from roughly the largest to the smallest this week (except for that one foray into neutral scraps of all kinds earlier this week), and today I'm going to talk about what you can do with some of those teeny tiny little bits that are most likely hanging around in your scrap space. You know, the little ones like you see on top of the piles in the photo below.
Actually, before I launch into today's chat about itty-bitty scraps, I want to back up and talk about really big scraps, because you may have noticed that I didn't really talk about pieces larger than a 4"x6" block this time around. There are two reasons for that- first, I used up most of my bigger scraps in the last Use Your Scraps Week series when I made a bunch of DIY Smash books, so I really didn't have any to work with. Second, my scrapping style has changed such that I use much smaller chunks and strips of paper on layouts than I used to, meaning that I end up with some pretty big pieces left over- like, 8x12-ish big (or bigger) at times- so now I just file those bigger pieces away in my paper storage, right back with the lines and collections they originally came from. And, guess what? I actually use them there! It would seem that my best tip for using up big scraps would be to not think of them as scraps at all.
Now, if you do happen to have a lot of big scraps that you need to use up, be sure to pop in this evening when I'll have a special edition of Friday Favorites that includes lots more ways to use your scraps, both big and small.
Okay, now let's get back to those teeny tiny pieces, shall we?
As luck would have it, one of the biggest trends in scrapbooking right now is actually a great way to use some of those little leftover bits, because it really doesn't get much smaller than confetti!
Yes, confetti is everywhere! And once you figure out two items about how you want to do the whole confetti thing, it's a super easy technique to incorporate on your projects. What are those two things? They're a) how to make confetti and b) how to attach confetti.
Making confetti can be as easy as punching. Some punches are just perfect for creating lots of pieces at once, like my three favorites to use for confetti in the photo below.
I bought all of these punches at Michaels using the ever-present 40% off coupon, so this is definitely an area where picking up a new tool for the job won't break the bank. I've also heard of scrappers using single-hole punches from the office supply section to make theirs (though the very idea of it makes my hands hurt!), and I've even read posts from a few who use the little bits they scrape off their Silhouette or Cricut mats after a particularly intricate cut as confetti.
Adhering confetti is where things get tricky, since all of those little bits can take ages to glue down piece-by-piece. I'm pretty sure that's the method Karen used on this card, though, because I don't think she could have achieved that awesome color spectrum look in any other way!
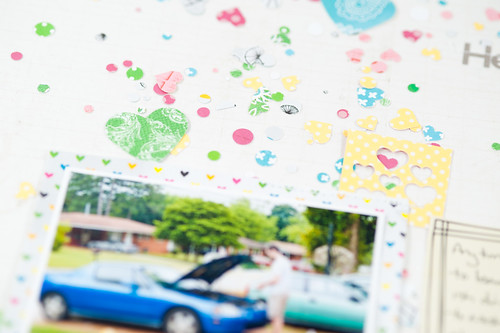
Adhering those little pieces en masse seems to be the way to go with this technique. I'm a huge fan of Davinie Fiero's spray adhesive trick, and even used it on a recent layout here (you can see a peek of it below).
Lisa Truesdell, the Queen of Confetti herself, sews her little paper bits into fantastic pockets where they can still move around a bit, adding a random quality to the page. You can see a video of her technique here at 2Peas in one of her Memory Keeping Monday posts. Davinie Fiero has also dabbled in this method, and you can see her page here.
By far the easiest and least messy confetti-adhering technique that I've seen though, was in a recent video on the Lawn Fawn blog. This super-simple method requires nothing more than a tape runner- no fumes or stitching required! Just put a few strips of tape across the page/tag/card and press the confetti in. Done.
After a week of fairly in-depth tutorials, I was totally on board for something easy, so this was the technique that I used for today's projects.
I started with the two tags that I demonstrated DIY misting masks on in yesterday's post along with some coordinating paper scraps.
Then I punched my confetti using the Swiss Cheese border punch. You can see how small this scrap was, yet it yielded a good amount of confetti! And even this punched-out piece can be used as an accent on a layout if you have an especially funky, fun scrapping style.
The finished tags came together very quickly- just a few swipes of tape from my ATG gun, a sprinkling of confetti, and the addition of a stamped sentiment and a few small embellishments and I was done. Oh, and those orange flower brads scattered in the confetti field? Are positively ancient ones by Making Memories that I bought long ago. Yay for using up scraps and old stash!
This second tag is even more simple. Wouldn't it be cute attached to a can of chicken soup and given to someone who's feeling a bit under the weather?
While this is the last big project post for this round of Use Your Scraps Week (is it just me, or did that fly by way fast?), the festivities aren't quite over yet! I'll be back tonight with one final post rounding up several more scrap-using ideas from around the web. See you then!
Supplies (click on images for product links):


