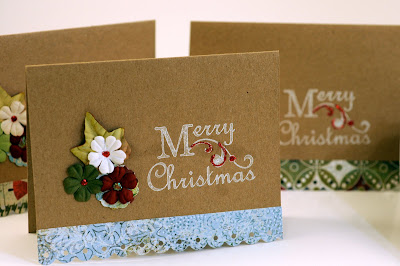
Now that most of my Christmas cards have made their way to their destinations (at least, to the destinations of people who read my blog), I can safely post them here without spoiling any surprises. :)
I started my cards in early October after seeing this video by Kristina Werner. I loved the scalloped border, but instead of using pre-made cards I made my own borders and attached them.
I started my cards in early October after seeing this video by Kristina Werner. I loved the scalloped border, but instead of using pre-made cards I made my own borders and attached them.

The stamping probably took the most time, not because stamping itself is time consuming, but because I couldn't get my acrylic stamps to cooperate with the white ink!! The rubber sentiment stamp (from Hobby Lobby) worked beautifully, but I couldn't stamp a flourish with the clear stamps without the ink either beading up or smearing horribly, even after I treated the stamps with every kind of eraser I could get my hands on!
Then I got the bright idea to use a glue pad and glitter instead, but I just couldn't get the glitter to stay on the card after the glue dried, even with the Martha Stewart glue pad and Creative Imaginations Super Spray fixative. The stuff just kept flaking off!
Finally I gave up on the clear stamps and bought another rubber stamp (on sale at Michaels) to use on the front. Then I got down to the really fun part. I assembled layered embellishments for the front of each card on sheets of Glue Dots, along with loads of single flowers with Stickles in the center.
The thirty cards I made took a LOT longer than I had anticipated, so it's a good thing I started on them so early in the season. I hope that they bring smiles to the faces of their recipients. :)


Our lovely one produced two happy smiles...so pretty!!
ReplyDeleteThank you!
when i can't get the ink to work with my clear stamps . . . i use a nail file and lightly sand the top of the stamp. works every time!!!
ReplyDeletemerry christmas!!