
Supplies:
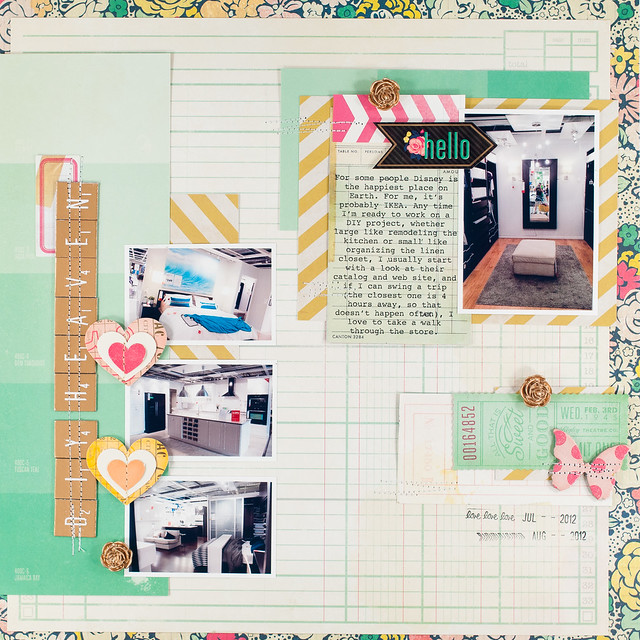
I'll start with the layout, using Maggie Holmes' Flea Market collection and a few photos that I snapped on a visit to IKEA. Since I have a slight addiction to DIY (and also to all things related to organizing), IKEA is basically my crack house. I don't get to go often because the closest one is a little over four hours away, but last summer I was working on a project for work that would often send me on road trips where I would drive right past one of their stores. You can bet that I stopped in almost every time!
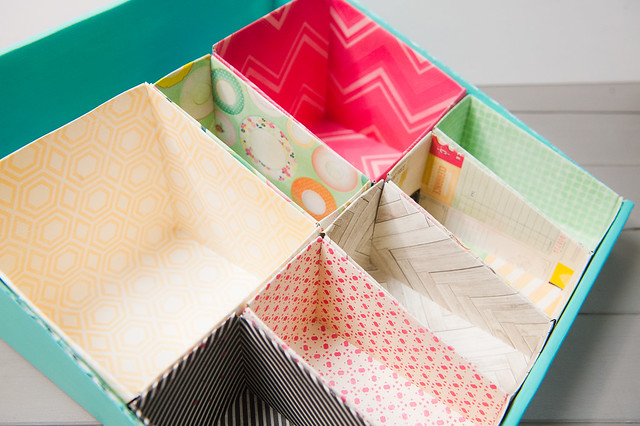
With DIY on the brain and the gorgeous Flea Market papers on my desk, I decided to pick a couple of projects that I'd recently spotted while browsing Pinterest- a desk organizer for Project Life items and drawer organizers made from empty snack food boxes- and combine them into one. I love it, and it turned out looking a little something like this...
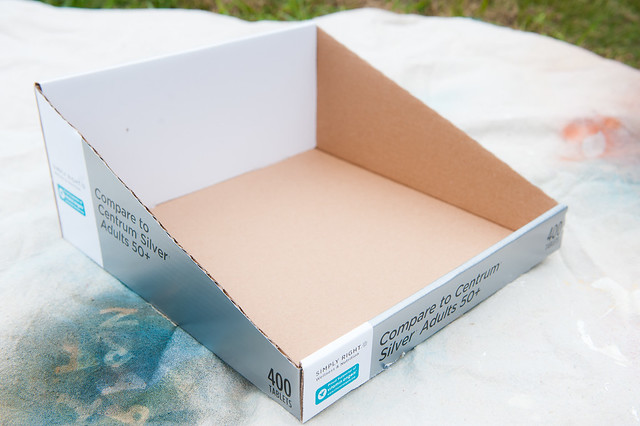
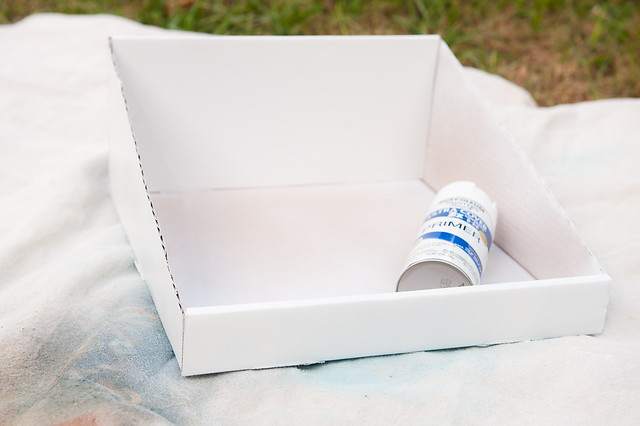
It was also super easy and inexpensive to make, though it did take a bit of time. I started with this humble box that I brought home after a shopping trip at Sam's Club as a base and gave it a couple of quick coats of spray primer from a can that I had left over from a previous project.
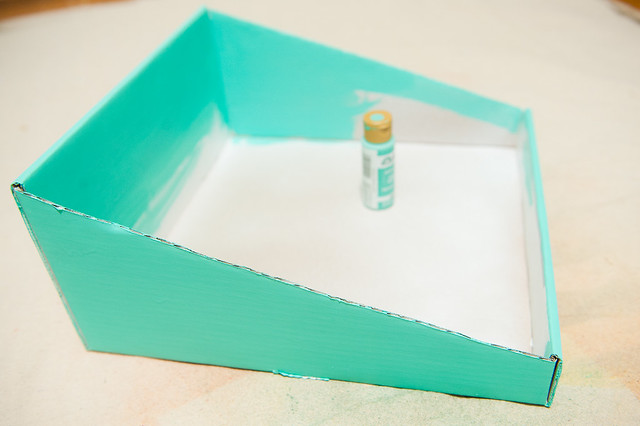
Using a bottle of Folk Art craft paint in Patina, I then painted the outside of the box as well as most of the inside of the back and a few inches of the sides. Since the divider boxes were going to cover up most of the base and sides, I didn't worry about painting the entire thing.
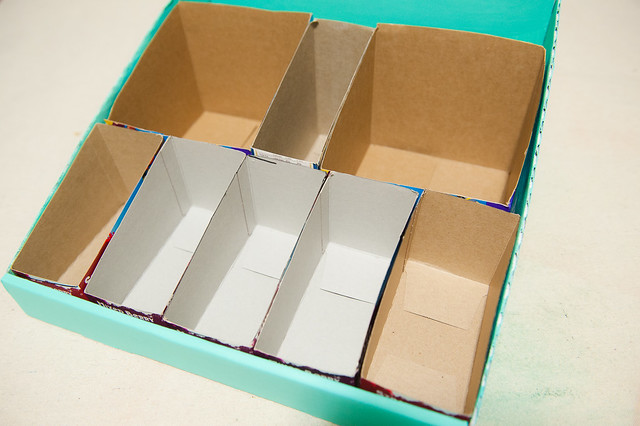
Speaking of divider boxes, those were my next task. I used a few different sizes of snack food boxes (yes, I do love my Clif Fruit Ropes!) to fill the front of the box, then marked off the edges of the box with a Sharpie and cut all of the inner boxes to match the slope of the sides.
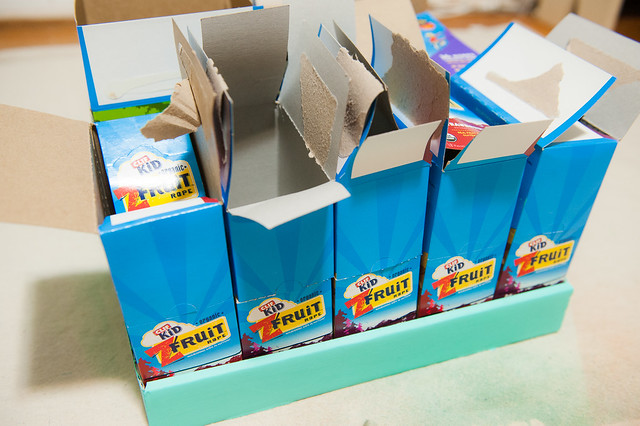
I did leave a few inches in the back open, making the perfect spot to hold 12x12 papers, stickers, and chipboard sheets.
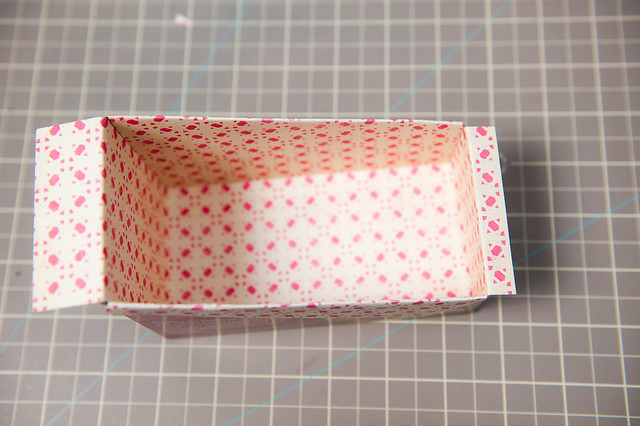
Once I got into a rhythm with covering the inner boxes, they were really easy. I wanted to minimize the amount of paper used while still covering all of the visible portions of the box, so I cut two smaller pieces (one for each side) and one long strip to cover the inside of the front, back, and bottom of the box.
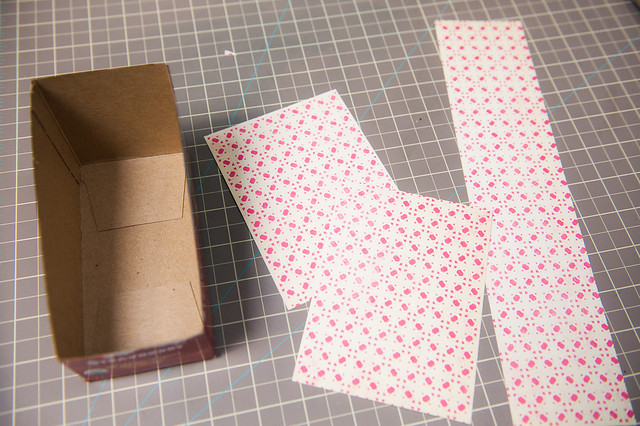
I scored the side pieces along one edge so that a tiny bit would wrap down to the bottom of the box and folded any excess over the top to cover the raw edges.
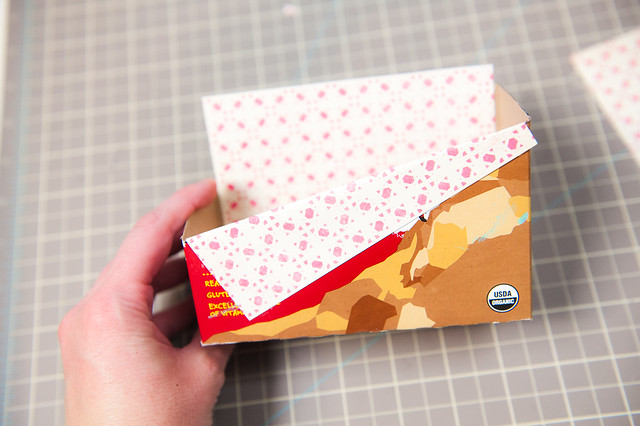
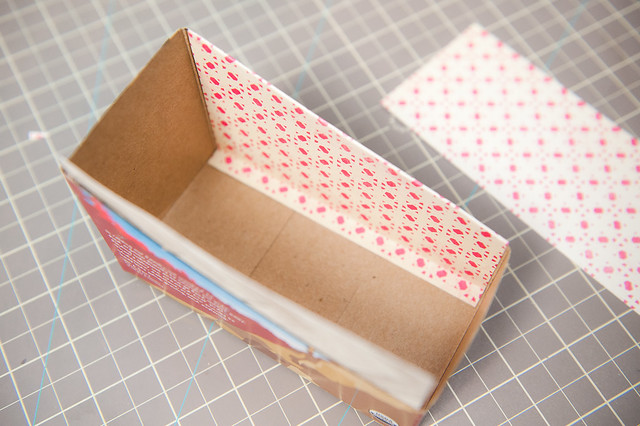
Then it was just a matter of adding in the longer strip of paper to cover the rest of the surface area!
After all of the inner boxes were covered, I placed them all back into the base box, using hot glue to make sure they stayed in place.
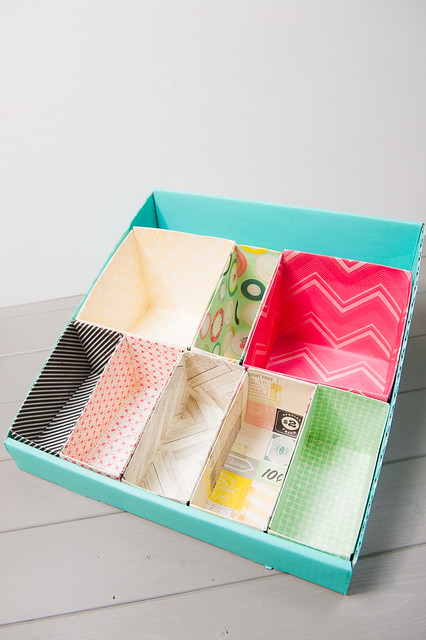
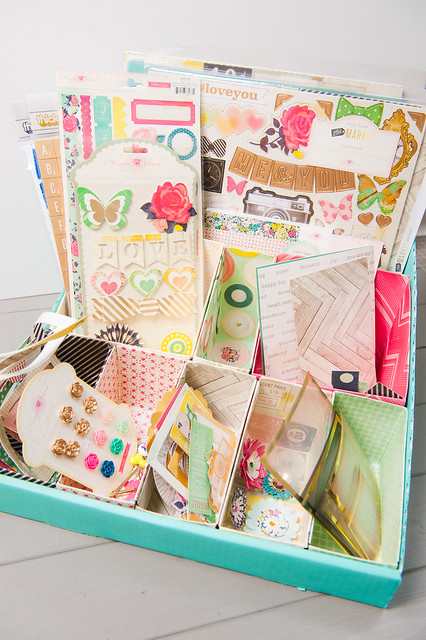
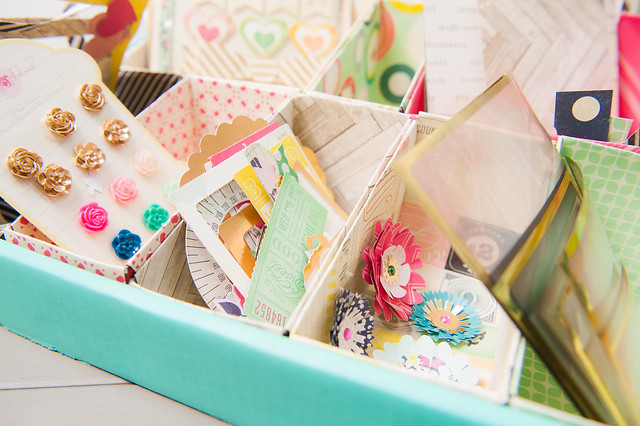
And now this organizer is the perfect place to hold the current kit or collection that I'm working with at the time. I filled it up with the Flea Market collection before scrapbooking the layout above, and right now it's on my desk filled with the October kits from Citrus Twist. I'm liking it even more than my tray solution for kit scrapping!