
Yes, I'm one of those freaks who genuinely enjoys organizing my stuff (did I mention that yesterday?), whether it be scrapbooking supplies or something else around my house. My heart goes pitter-patter at the mere mention of my label maker, and the sight of orderly shelves of color coordinated supplies makes my scrap room an over-the-moon happy kind of place for me to be.
There are several areas of my scrap room that I either totally reorganized or simply tweaked to fit in with my new processes, including storage for tiny embellishments (mostly the little bitty die-cuts), paper, kits, and my most used supplies. (If you want to see all of my scrap room organizational projects, check here under the Scrap Room category.)
Tiny Bits
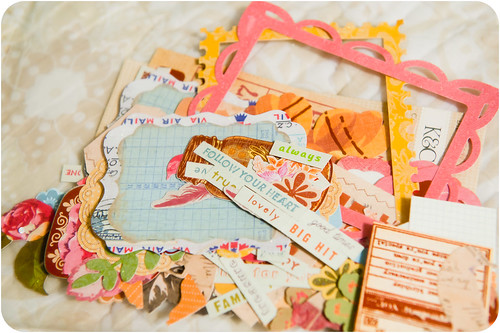
That's what I've taken to calling packages of small die cuts, like this collection of K and Company pieces. I totally love them and want to use them constantly (especially for all those edge treatments I've become so fond of lately), but Oh.Em.Gee is it hard to find one to match my layout when they're all jumbled up in a package like this!
I've already sorted the rest of my embellishments by color, so it made total sense that these tiny treasures should make their way into my color bins, too. The problem is that they're so small and delicate that they could easily be lost and damaged amongst the larger items in the bins. Enter this set of smaller containers (sub-bins, if you will):
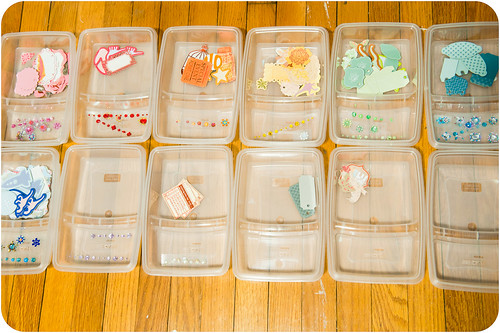
I picked up these small boxes (they have snap-on lids) in the food storage department of my local Big Lots store. If I recall correctly they came 4 in a pack for $3, and the bonus is that if I end up not liking them for the scrap room, they can be cleaned out and moved to the kitchen to use for packing lunches. So far so good, though- they're perfect for corralling small die cuts in the bigger compartments and little blingy bits in the small ones. These small boxes go right into by bigger color bins, so everything is still very accessible.
Background Papers
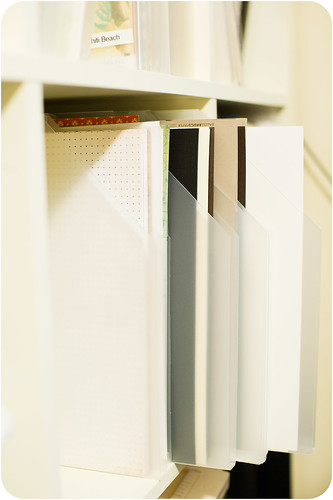
I find now that I mostly scrap on neutral cardstock as a base- kraft, brown, black, grey, white, or cream- so I pulled all of these papers out of my regular cardstock sotrage and put them in their own little spot near my scrapping desk.
I'm also using ledger papers as backgrounds a bit more now, so I filled a couple of Cropper Hoppers with them, too, and filed them next to my neutral cardstock.
Kits
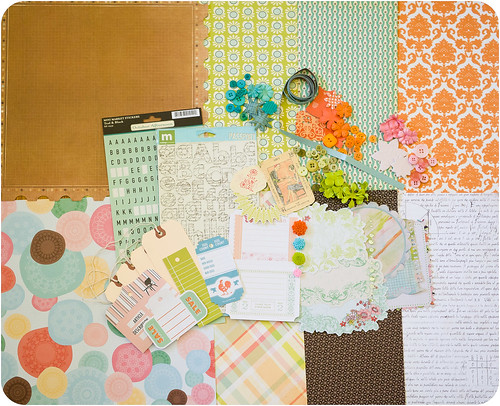
Ever since I discovered the wonder that is the Counterfeit Kit Challenge, I've become quite the little kit scrapper. I love having a package of coordinated items at my fingertips, and the fact that it all came out of my stash (which theoretically means I liked it enough to buy it in the first place) and didn't cost me an extra cent is a huge bonus. Take, for example, Studio Calico's Lawn Party kit from last month- I made my own version (blogged here) totally from stash and subbed in some items I did like for items I didn't really care for in the original kit, making it totally personalized.
Also? Instead of pulling out tons of supplies every time I want to scrapbook a page, I only pull them out when I want to make a kit, which is a couple of times a month. This doesn't mean that I don't still pull individual items when I'm making layouts (especially for pages that are for a certain call or challenge), but on the whole I do way less rummaging through bins and a lot more putting stuff on pages now.
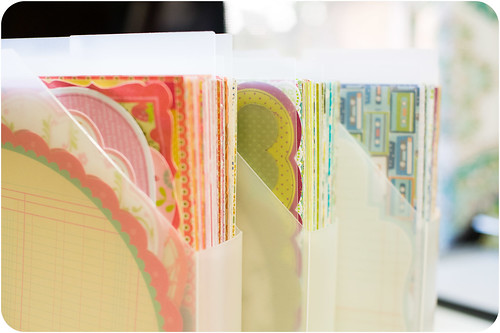
Patterned Paper
A side effect of all the kit-making is that it's now much more practical for me to store my patterned paper by color instead of manufacturer (since that's how I go searching for pieces when making kits). There are still some lines that I keep together, but I'm slowly moving the remainder of my patterned papers into organizers based on color. I work on this fifteen minutes at a stretch instead of doing all my paper in one shot.
Printing Photos
Possibly the biggest organizational change to come out my Style Reboot is in the way I print my photos. I wrote a long, detailed series of workflow posts last year about how I used to choose photos, select a sketch based on the number of photos, crop/resize the photos to fit, then fill standard-sized canvases with those photos to have printed.
I'm tired just thinking about it!!
Now photo printing is soooo easy. Once a month or so I go through photos from the previous month (I've started with current photos for now since I've printed and kitted so many pages from older photos already) to select and edit the ones I want to print (already having a bunch of photos edited for my monthly photo roundups really helps with this). Once I've selected those photos (I do this in Lightroom
All that may sound complicated, but it really only takes a few minutes (if you subtract out the actual editing part) to sort through photos and decide what to print and at what size. Notice that I don't do any resizing at this stage at all- instead, I have a "To Print" folder on my desktop that contains subfolders for images destined to be 4x6, 4x3, or 2x3, and I drop the exported JPG files right into these folders. At this point I wait to print until either A) a good coupon for a printing service comes along or B) I get the urge to scrap a certain photo.
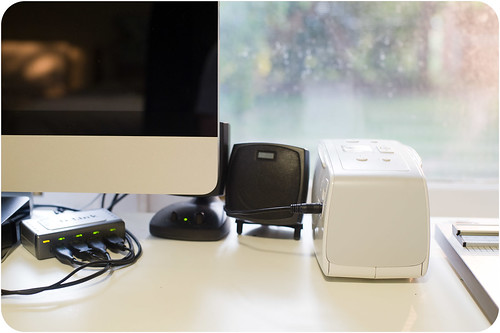
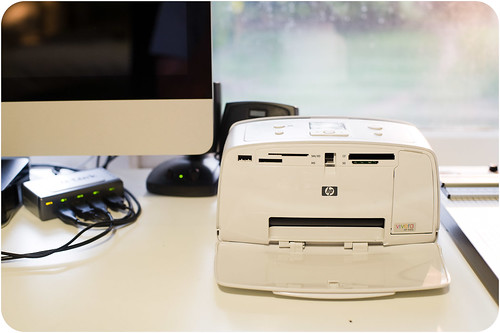
If option A happens, I use Picasa's collage feature (I blogged about how to use it here) to create any 4x3 or 2x3 photo collages (by adding either 2 or 4 photos to a 4x6 canvas), then export the 4x6 collage from Picasa to upload to the printing service. If option B happens, my small 4x6 photo printer (which I now keep handy on my desk at all times) has options for printing 2 or 4 photos on a page right in the on-screen menu, no collaging necessary. Note that I use a really simple tools to do the collage step for me now. I do know how to do this in Photoshop Elements, but I don't enjoy it at all. Finding a way to eliminate a hated step in the printing process was a huge step toward making my scrapbooking process more streamlined and enjoyable.
The best part about the new photo printing workflow for me is that I'm printing a lot more special photos from events where maybe I only have a photo or two from each that I want to scrap. In the past I'd get a coupon for a printing service and spend days editing, cropping, and re-canvasing like a mad woman to get enough photos to fill an order. Unfortunately this meant that I'd often focus on big events with lots of photos (like my cruise album planning here) and skip over smaller evens in my rush to finish. Now whenever a coupon comes along I automatically have a pile of photos waiting that are ready to upload and print in a matter of minutes.
Packing for Crops
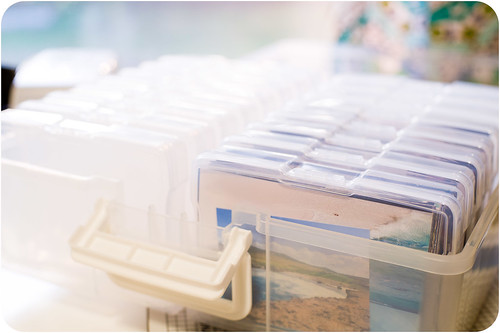
Can I just take a minute to say how easy it is to pack for crops now? With a pile of kits full of coordinating papers and embellishments and printed photos at the ready (or at least easily and quickly printed), I can just grab a kit or two, a stack of photos (I store printed photos by month in an Iris Photo Keeper case full of smaller cases), and my basic tools and go. I can literally be out the door for a crop in fifteen minutes or less. And if I decide to take extra tools with me, like my Fiskars Stamp Press
I hope you've enjoyed following along with my Style Reboot series as much as I've enjoyed sharing it with you. I feel like a whole new scrapper now that so many kinks have been worked out of the system!