
The folders are all meant to be stored in Heidi's Memory File box. Now, the box is really very nice (I received one in my design team package), well made, and quite pretty (love the quatrefoil pattern on it). But I have to admit that the idea of having lots of traditional layouts in albums and then a file box (again, a very nice box) full of other scrapbooking projects didn't really fit into my album organization system. I do mostly chronological scrapbooking, so for me a box like that would have to be reserved for a special project all on its own, separate from my regular layouts. Actually, I will probably end up using said very pretty box to organize supplies or papers in my office- I got the turquoise one and absolutely adore the color!
So, when I was asked to put together a Memory File project for Heidi's blog, I stepped outside the box (yes, bad pun, I know) and decided to find a way to incorporate the Memory File folders and all those awesome interactive bits into one of my regular albums.
I had already used Heidi's No Limits paper collection to scrapbook a layout about our Aruba vacation last year, which gave me the idea to use the No Limits Memory Files right in my Aruba album!!
If you were around last November when I ran my Travel Scrapbooking Week series, then you got a glimpse at how this album is organized. It's a mix of divided page protectors, traditional layouts, and even some full-size 12x12 photos. I've actually changed course just a bit since writing that post and am no longer using the same set of supplies (I'd originally intended to only use Cosmo Cricket's Salt Air collection) throughout the book and am instead letting it become an eclectic mix of designs. It's definitely a work in progress, but I love it!

One thing this album lacked, though, was dividers. My plan was and still is to divide the book into sections, with one section for each day of the 8 day adventure, and I thought that the Memory File folders would be the perfect thing to use to separate the sections. I also have a fair amount of ephemera (maps, wrist bands, receipts, etc.) from each day of the trip, and I wanted the Memory Files to also serve as a place to corral all that extra stuff while still keeping it accessible.

But how do you put a file folder in a 3-ring binder? Punching holes won't really work as it doesn't allow the folder to fully open on the rings, plus it takes up some of the valuable scrapping real estate. Luckily, my OCD self had once upon a time wanted to store magazines in three ring binders and remembered that I had used a special type of holder that slipped over the pages and held the magazine in by the spine. I jumped on Amazon and quickly found just what I needed (you'll find it and all the other supplies for this project linked up at the end of this post), and few days later these arrived (thank you, Amazon Prime).

These little holders are lightweight and fairly translucent, so you really don't notice them once you've slipped your magazine, catalog, or in this case file folder through the slot.

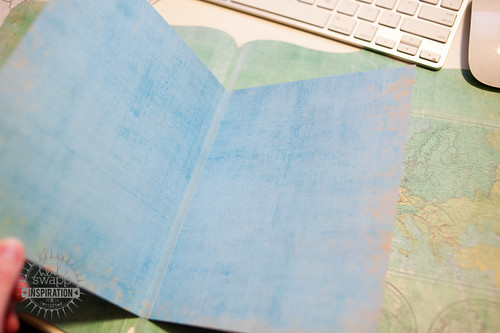
Next up, I went about making a pocket to hold all that extra "stuff" I mentioned earlier. I started with a 7.5"x12" piece of paper from the No Limits collection and scored it down the middle (when folded in half it creates a 7.5x6 pocket). I then folded the paper right over the edge of that same slot that I'd slipped the file folder through. I could have simply made a pocket and adhered it to one side or the other of the Memory File folder itself, but this way the pocket becomes an extra interactive element in the middle of the folder and also leaves both sides of the folder open for photos and some of those cool Openables that are part of the Memory File line.
I used a circle punch to cut a small notch at the top of the pocket, just to make it easier to add and remove items.

And here's what the whole assembly looks like before any photos, ephemera, or embellishments are added.

I scrapped away and added all those extras (you'll see the finished product in a bit), and then it was time to add the folder to the album.

Thanks to the handy-dandy magazine holder, the Memory File folder now fits beautifully inside the album!

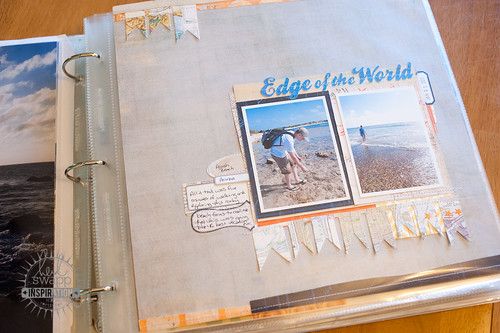
And inside? I went nuts with all those fun Memory File accessories! On the left I used a journaling Openable, a really cute Polaroid-style frame, and one of the awesome (or in this case "epic") photo mats. And I couldn't resist digging into the sequined embellishments in Heidi's line- love that star on the pocket!

The right side of the folder holds a Foto Stack. I could have added more to this side, but I loved that map print on the folder so much that I didn't want to cover any more of it up!

The journaling Openable is one of my favorite pieces of this project. I completely filled it with details about the adventures of this particular day (taken from blog posts I wrote shortly after we got back home). Oh, and notice the little stamped images? Keep those in mind- they'll be important later. :)


All of the Openables and interactive elements remind me so much of Nick Bantock's Griffin and Sabine books. If you've not read these and you love books that are just a little different you might want to check them out. They're filled with gorgeous artwork (Nick Bantock used to have an ink line with Ranger- someone recently commented on his inks in the photo below, originally from my scrap room post, which are unfortunately now discontinued. As soon as I found out that Ranger wasn't making them any more, I made sure to buy the set!) including postcards and letters that are in actual envelopes that you can open and read. Such an engaging way to tell a story! I'll link the books up below, too, in case you're interested in checking them out. Those books must have made an impression on me- I read them before I was a scrapbooker, but think of them often when I'm making pages!

But, I digress...back to the project, right?
I printed several photos from this day of the trip as 2x3 prints (I used a smaller size so I could fit more of them in), then arranged them in chronological order through the Foto Stack. And those stamped icons I mentioned from the journaling Openable? They're repeated here next to photographs that correspond to the journaling that they're stamped beside- kind of a legend to help the reader match up photos and text. :)


And then of course I finished it off by putting ephemera in the pocket I made earlier.

There are so many ways that these Memory Files can be used in your scrapbooking, with or without the coordinating box. You can find more ideas for using them on Heidi's blog under the Inspiration category, and I'm sure over the coming weeks and months we'll see more unique ideas for using them!
Supplies (click on the images for product links):
The Griffin and Sabine books: