
I was asked to participate in one of the weekly "Out of the Box" challenges for my first design team assignment at Pretty Little Studio. Fellow team member Marie Ramirez and I were both asked to take color inspiration from the image below for our layouts...and you know I love a good color challenge, right?

image credit: scrapologie
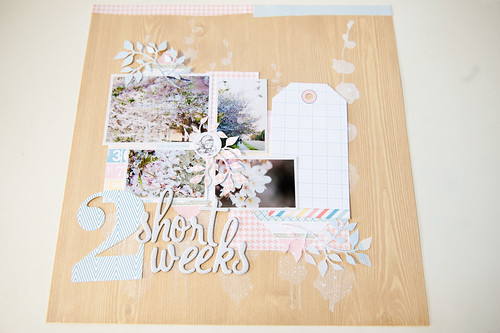
After a bit of scrapping I came up with this layout, and, since it's the first one I've made for Pretty Little Studio, I thought a step-by-step look at how I put it together was in order!
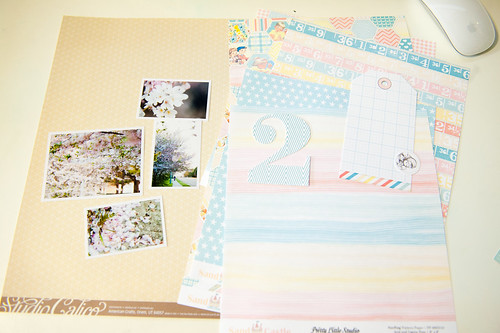
The bottom-left photo in the inspiration collage caught my eye and reminded me that I hadn't scrapped any cherry blossom photos for a while now. I know, unheard of, right? So I pulled several unscrapped photos out of my storage binder (yes, a post on that is coming) along with a few sheets of patterned paper as candidates for my page background. All Pretty Little Studio papers are 8x8 (owner and designer Melissa Ross prints and produces all of her products in house), so using a patterned paper or cardstock background is a must for 12x12 layouts. The three sheets below are from various Studio Calico collections, and since the focus here is Pretty Little Studio I kept it to simple, basic designs that would let the PLS papers shine.

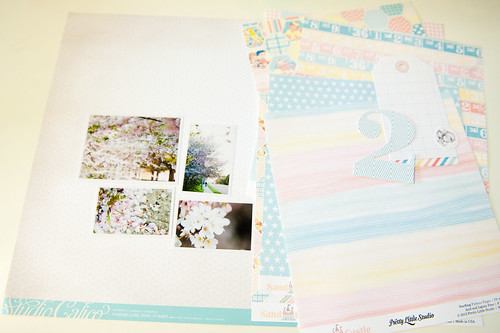
I still needed to narrow down my background paper decision to just one of those, but before I jumped into that I pulled out several sheets of paper from the Pretty Little Studio Sand Castle collection (along with a few embellishments) that coordinated with the color challenge image.

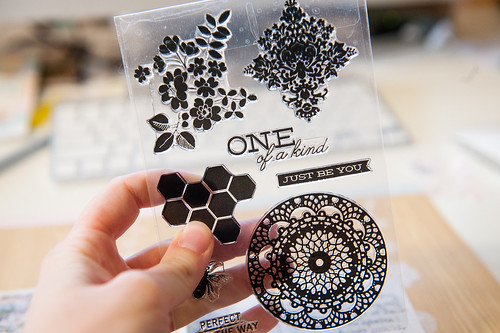
And of course tools by any manufacturer are fair game here, so I pulled out some of my newest toys- stamp sets by Studio Calico and My Mind's Eye, a brand new mask by Prima that had just arrived the day before (in both 6x6 and 12x12 sizes since I remember what happened with the smaller hexagon mask in one of last month's posts!), and the little leaf spray Sizzix die that I picked up at JoAnn a few weeks ago. I probably won't use everything here, but it's a good way to help narrow down the choices before I really get started.

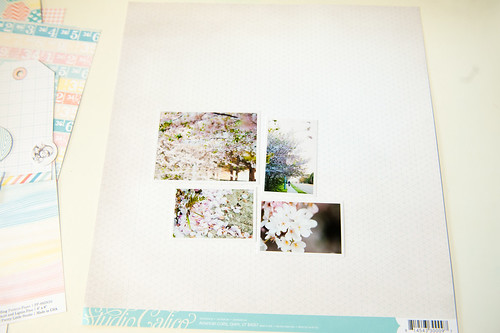
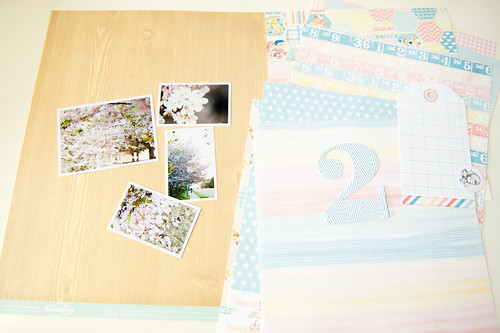
Next up, it was time to audition my background papers. I narrowed down my photo choices to four, arranged in a loose grid, and placed them on each of the three candidates in turn to see what worked best. I really like the photos on this white page with a light blue geometric print, but I've got some Thickers in mind for the title that have exactly the same pattern, and they'd blend into this in a heartbeat.
It does look great with the papers, though!
Next I tried a cream paper with the same geometric print. I like it, but something about its very rigid, symmetrical pattern isn't jiving with the softness of the papers in Sand Castle.
So it was on to
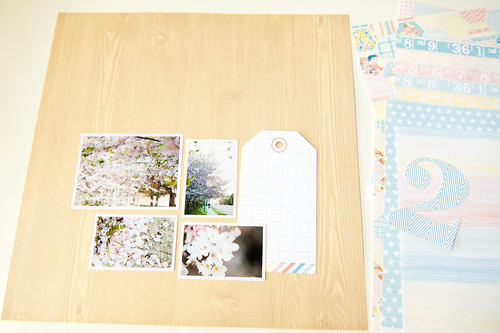
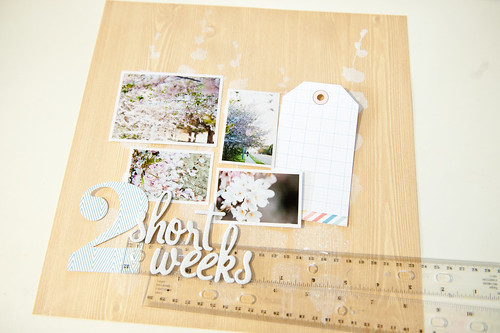
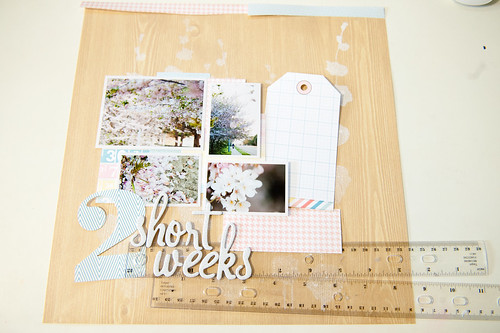
With the background paper decision made, it was time to get down to scrapping. I'm still going with the loose grid arrangement for my photos, and the journaling tag finds a home right away so I don't forget to use it (because, yes, that totally does happen!).
Before I get too far into things, though, I want to add some misting to the background- it's much better to do this before a lot of layers are put down rather than after since moving everything off the page and then back on again in the same configuration is next to impossible.
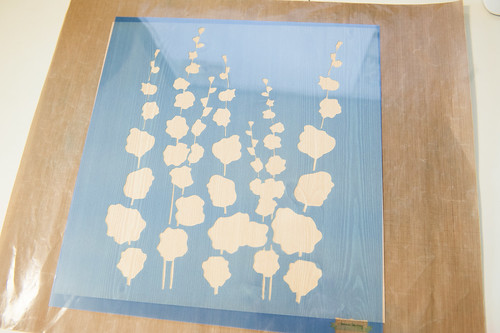
I'm going with the 12x12 poppy mask instead of the 6x6 since the photos and tags take up a fair amount of space on the page, and I'd actually like to see some of the misting on this layout!

Yeah, I'm seriously, seriously loving this mask!
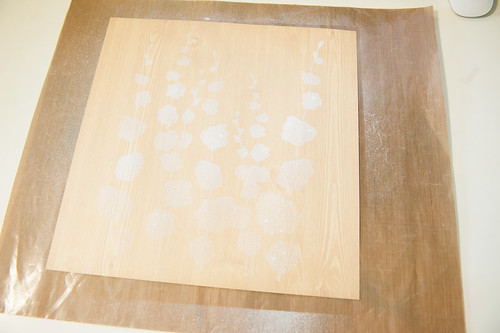
Okay, so now the mist is dry and I've got the photos and journaling tag back on the background.

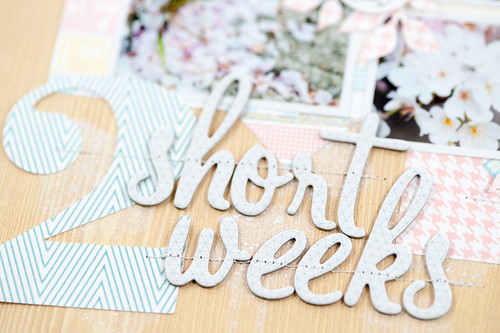
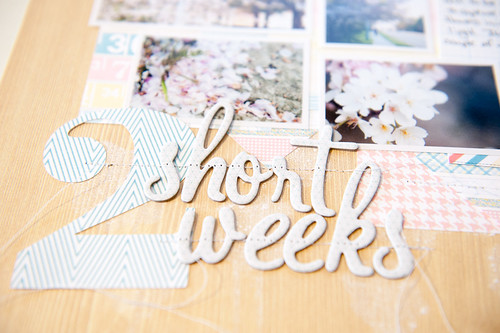
I know the title is going to be kind of large, too, especially with that awesome die-cut number "2" in the mix, so I get that all lined up early as well.
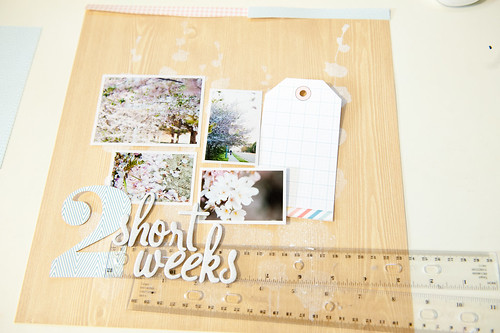
It was looking a little crowded at the bottom, so I shifted everything up a bit and also went ahead and put a couple of patterned paper bits across the top.
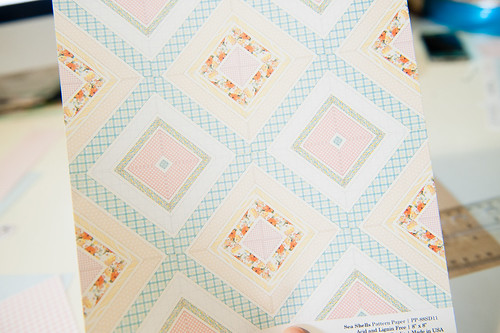
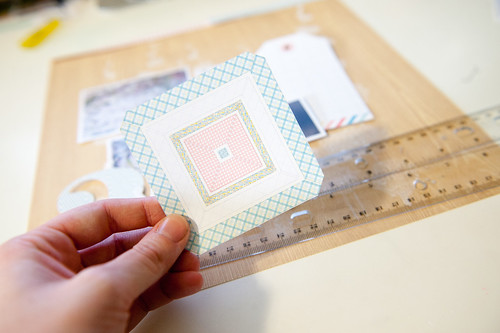
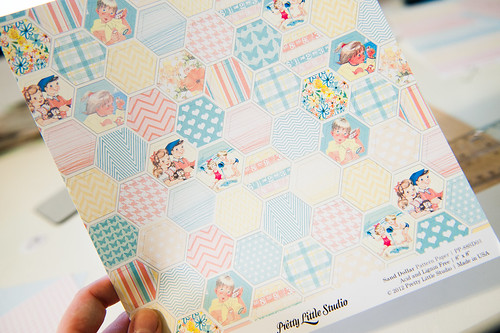
There are a couple of sheets of paper in the pile I pulled out that would be perfect for fussy cutting individual elements, like the quilt square and hexagon prints below, so I put them to the side (well, after cutting out a square from the quilt print just to keep nearby in case inspiration strikes) so I won't use them with the other papers.
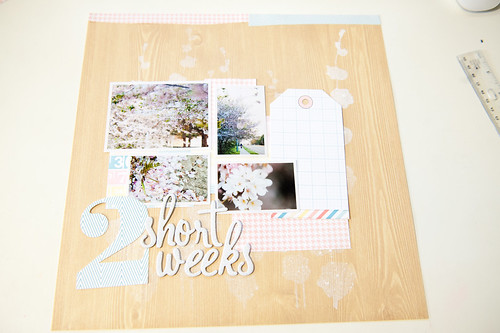
This page doesn't really need a ton of patterned paper on it, so I added just a few bits here and there around and behind the photos, just to make them pop a bit more.
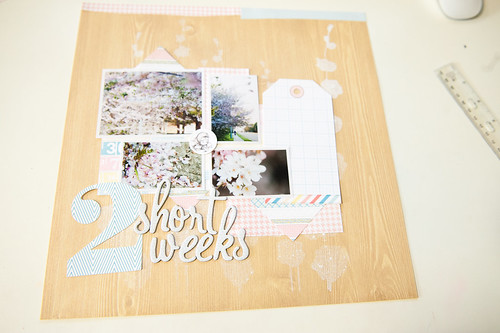
After the paper layers were in, I adhered everything down before moving on to add more embellishments. Pieces were shifting around the page a bit as I worked, and I was afraid I'd accidentally knock it all off the background if I tried to embellish with it in that state!
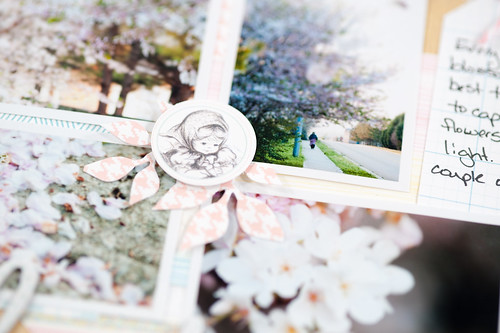
One of the embellishment packs included this adorable vintage image of a girl smelling flowers, so I added it to the center of my photo cluster to pull it all together.
And then I took the quilt square that I'd cut out earlier and further cut it into triangles, tucking three of them under the photo cluster to form a loose visual triangle around the pictures.
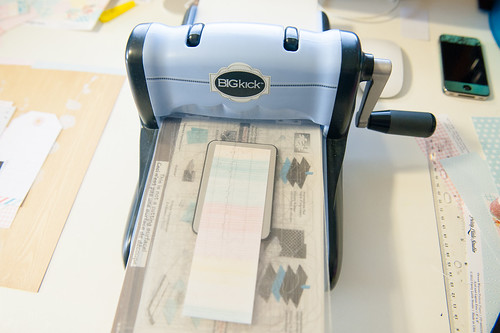
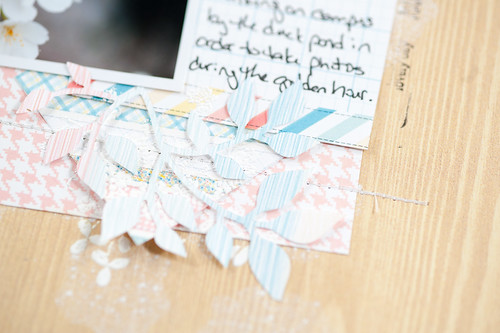
I still wanted to bring in more patterned paper, but with softer lines, so I turned to my Big Kick and my Sizzix die to make a few pretty leaf sprays.
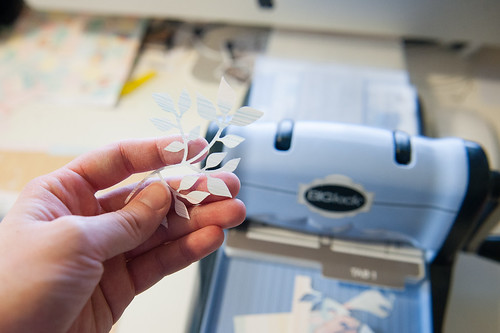
I'm going to trim these up and reshape the branches to make them smaller before adhering them, but this is the general idea of where I want them to go.
I didn't want to stitch through the leaf clusters, so I took the layout over to my sewing machine and stitched everything down before I stuck them down.
I was also in a bit of a mood to do some heat embossing, so I selected a stamp (the floral spray in the top right of this set by My Mind's Eye) and stamped and embossed it in two areas of my page- over the top and bottom hand-cut triangles.

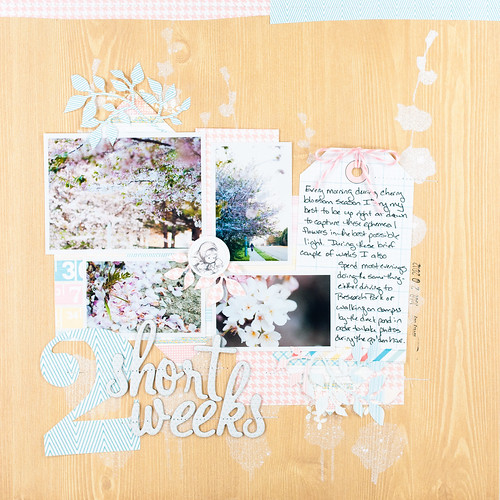
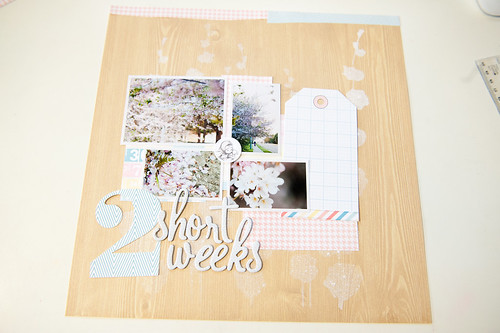
And then it was just a matter of putting the last pieces together! Here's the finished page with the die-cut leaf clusters trimmed up and a bit of writing added to the journaling tag.
Supplies (click on images for product links):
  |