
 |
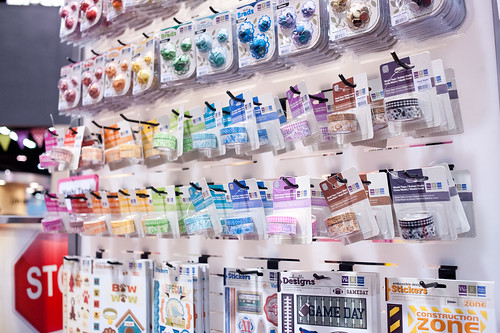
| We R Memory Keepers Washi Tape at CHA Winter 2012 |
After I photographed my first CHA show (Summer 2011) I had several other attendees ask me for tips on taking photos at the event, and I was actually able to meet up with a couple of them at the Winter 2012 show a few months later to give an on-site crash course in convention photography. I've wanted to get the information written down and available to a wider audience for quite some time, and with the Winter 2013 show rapidly approaching, now seems like the perfect time!
I know that this post is targeted to the small number of people who actually attend CHA, but I think that some of the same principles apply when you're shooting at any similar event- I actually followed almost everything here when I was taking pictures at Star Wars Celebration VI (with the exception of also packing a zoom lens for the larger auditoriums), and a lot of these items apply to pretty much any large, multi-day indoor event. Hopefully there will be a little something here to help everyone no matter what event you're shooting!
Equipment
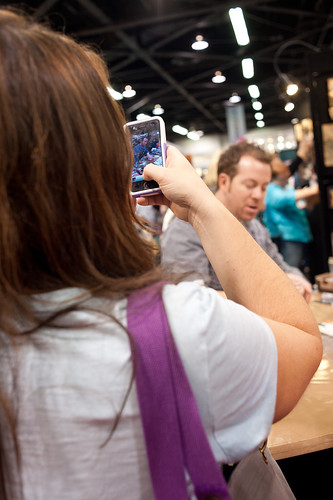 |
| May Flaum taking video of a Tim Holtz demo at CHA Winter 2012 |
You can, of course, shoot CHA or any similar event with any camera ranging from an iPhone up to a DSLR. For image quality and functionality reasons I recommend a DSLR that is capable of producing images that look decent at ISO 1600. Most DSLRs (even the inexpensive ones) in the Nikon and Canon lines that have been produced in the last 12-18 months fall into this category, including Nikon's D3100 and D5100 bodies (since I shoot Nikon cameras I can't speak for any Canon models except for the 5D Mark II (my dad shoots one), which definitely qualifies). I recommend a camera capable of capturing good images at such a high ISO because it will eliminate the need to use a flash- I'll get to that in a minute.
Looking back at my photos from the last two shows, I found that I shot most of them with an f-stop (aperture) between 3.5 and 5.6 (if that doesn't make sense to you, please hang on until the next section- I'll refer you to some reading that will help!). I used a 35mm f/2 or 50mm f/1.4 prime for all of those shots, and most kit lenses (normally the lens that ships with the camera) are capable of those f-stops and zoom ranges. Chances are that if you have a kit lens already you won't need any new glass to carry at the show, though a prime lens (a lens that shoots at a fixed focal length) will produce much sharper images (because the kit lens is wide open at f/3.5-5.6 whereas the prime is stopped down, sometimes to exactly the sweet spot of the fixed-focal lens) and is a much lighter option to carry since zoom lenses tend to weigh more (sometimes a lot more).
If your camera is not full frame (for Nikon, this means a DX camera and not an FX) keep in mind when purchasing a prime lens that a crop factor will apply to the advertised focal length. For Nikon this crop factor is a 1.5, and for Canon it is either a 1.3 (for the 1D series) or a 1.6 (most common). To find out what the actual focal length of the lens would be on your camera, multiply the advertised focal length of the lens times the crop factor. For example, a 50mm lens on a Nikon DX body is equivalent to a 75mm lens (50 * 1.5 = 75) on an FX. In a confined space such as a trade show floor, this means that you might not have room to back up enough from the subject to get all of it in the frame. If you have a DX Nikon, my recommended prime lens would be the 35mm f/1.8 AF-S DX. It's an excellent lens (my husband shoots one on his D5100, and the photos are superb), is inexpensive as far as glass goes (currently under $200), and is roughly equivalent to a 52mm lens on an FX body.
As far as flashes or external lighting, as long as your camera can shoot well at 1600 ISO and you have one of the lenses mentioned above, you shouldn't need any sort of external lighting at the show. In fact, flash photography in a booth can be distracting to other patrons, especially if you are taking several photos in a row. Flash photography can also lead to photos with a harsh tone or with unnatural shadows, so it's best to only use it when absolutely necessary.
The lighting on the Anaheim show floor is actually quite good, and I find that it's adequate in most cases. It's also decently white-balanced for daylight, though I do have to go back in post-processing and correct the white balance for some booths that use their own overhead lighting, where the bulbs have a different temperature than the show floor overhead lights. You can use a tool like the baLens white balancing lens cap to adjust for the lighting in these booths, but most of the time I find that it's easily smoothed out in post processing (more on that in a bit).
Since you'll be on your feet for most of the day and will have to carry everything you have with you, you might want to stick to carrying just one lens and not toting along a heavy camera bag. Also, there are many options for a more comfortable strap than the one that shipped with your camera. My favorite is the BlackRapid RWS-1FB, which slings your camera in a cross-body carry and makes it very easy to pull the camera up to shoot or just leave it hanging at your hip. I used to have terrible problems with my factory camera strap making my neck ache, and the BlackRapid completely relieved those issues.
You'll likely be taking enough photos to fill your camera's memory card each day, so either take along extra cards or have a laptop in your hotel room to download photos each night. Also, don't forget to charge your camera batteries! Right before you leave for your trip and in the hotel room each night are perfect times to do so.
Camera Settings
As I mentioned earlier, I shot almost all of my photos from the two shows I attended at f/3.5-5.6 with an ISO of 1600. I almost always keep my camera in aperture priority mode, so the f-stop is easy to set where I need it. As a rule of thumb, I try to set the f-stop as high as possible (to get the maximum depth of field possible) while keeping the shutter speed at or above 1/60 of a second (to reduce the risk of motion blur).
If you've never shot in aperture priority, I encourage you to read the Pioneer Woman's series, What The Heck Is An Aperture? for more information. Ree does an outstanding job of easing photographers into aperture mode (it's how I learned!) in this four-part series (Part 1, Part 2, Part 3, Part 4).
Etiquette
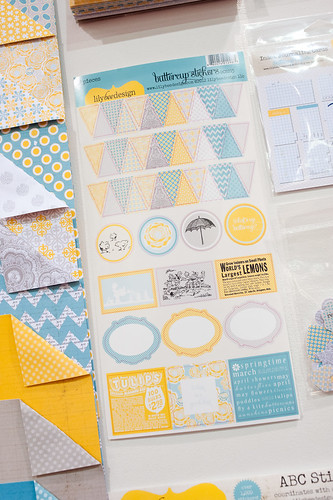 |
| Lily Bee's Buttercup collection at CHA Winter 2012 |
Yes, it's a lot of fun to attend CHA as a designer or member of the press and see all the new goodies firsthand, but it's good to keep in mind that the trade show is first and foremost a business environment. The purpose of the show is to connect store owners and resellers with vendors, and photographers need to be aware of this. When at a show, I always do my best to stay out of the way of customers, even if it means I need to leave a booth and then come back later to finish photographing when it's less busy.
It's also required that you obtain express permission from the owner of the booth (or booth staff, if they have authority) before photographing anything on display, whether product or projects. Some companies do not want their items photographed and may ask you to leave if you start shooting without permission. Some are fine with you photographing product, but not the projects. Many are happy to have you take photos, especially if you are planning to blog them or offer some sort of publicity. The reaction to having you photograph booths is also going to depend on your badge type- press badges and for the most part store badges are usually welcome to photograph items, but if you have a designer or vendor badge for another company, you might not be as welcome to do so- remember that these companies are all competitors!
Also, two minor points of photography etiquette in general- if your camera has an auto-focus assist light and/or a focus beep, turn both off. They're the photographic equivalent of texting or talking on the phone at the movie theater!
Post-Processing and Sharing
 |
| CHA Winter 2012 - We had to eat sometime! |
Now that you've shot all these great photos from the show, what do you need to do in order to share them?
There are, of course, lots of ways to do this, but for the sake of time I'm going to cover my personal workflow.
I start by downloading all photos from my camera to my computer using Adobe Lightroom (you can get a 30 day free trial from Adobe here). Usually my photos need at least some editing (adjust exposure, sharpen, correct white balance), so after I've gone through my photos and chosen the ones that I want to blog, I edit using Lightroom presets (my current favorites are Totally Rad and Adrienne Looman's presets in the 2 Peas store). Here's a quick hint- usually if you adjust one photo from a booth, those changes can be synced in Lightroom (highlight all the photos and click the "Sync" button, then select the settings you want to share across all the selected images) across all images from that booth. Normally the lighting conditions don't vary much within a single booth, and this helps get all the major adjustments out of the way while leaving only minor tweaks to be made here and there.
Lightroom also integrates seamlessly with Flickr, and I use a Flickr Pro account to host almost all of the images on my blog. Once your images are uploaded, each image page in Flickr has easy-access to the exact code you'll need to paste into your blog's HTML editor to show that photo at the proper size (there are a variety of sizes to choose from). I had a miserable time sharing lots and lots of photos on my blog until I switched over to using Flickr Pro (after Star Wars Celebration V, actually!), and now it's as easy as can be!
And, one final tip- try to keep in mind your purpose for shooting photos at CHA as you're taking them. Do you want to show all of the product from your favorite manufacturers? If so, you'll want to take shots that show all the pieces of each collection. Do you want to highlight trends? Getting closer to the action and photographing just bits and pieces may be better for you. Above all, have fun with it, and enjoy CHA!