
In yesterday's Travel Scrapbooking Week installment I talked a whole lot about scrapbooking while on a trip, but not so much about what happens with allllll those photos and allllll that stuff that got collected after you get back home. Let's face it- travel journals are great for capturing things in the moment or for getting the highlights of a trip scrapbooked quickly, but once you get home you probably have hundreds (or for long trips maybe even thousands) of photos that you're going to be itching to do something with. Today we'll talk about some of the many forms that something can take and some concrete steps you can take to prep for any one of them.
Step 1: Asses the Situation
First thing's first- you've got to corral those photos! Go ahead and block out some time to sit down and at least transfer your photos off of your digital camera (or off of the media cards if you used more than one) and place them all on your computer. Don't worry about sorting, culling or editing right now, just get an idea of how many pictures you're dealing with for this particular project. (At this point I should probably stop and preach to you about backups, but I'll suffice it to say that you really should be backing up your photos and leave it at that.)
This is also the perfect time to gather up any "stuff" that you collected on the trip- tickets, brochures, menus, foreign currency, etc.- that you want to include in your album. Again, don't worry about sorting any of this stuff, just get it together into a pile or container of some sort so you'll have an idea of the volume.
Step 2: Divide and Conquer
Now this is the step that will probably take the most time, aside from the actual scrapbooking, of any of the project phases I'll be talking about. This is where you go through your photos and sort them into categories. For a long trip you may choose to go with a chronological order and bin your photos by day (this is what I most commonly do), or you may choose to sort into other categories- for instance one category of photos for museums you visited, one for food photos, and so on. The possibilities here are endless, but it's really important that you choose something to go by since that something will form the framework for the rest of your project.
As you're sorting your photos, be sure to sort your memorabilia, too.
Step 3: Thin the Herd
If Step 2 is the most time intensive, then Step 3 is where the most mental/emotional exertion comes into play. This step is where you plow through all those photos and all that stuff and choose exactly which pieces you want to use. Notice I said use and not scrap, because we're not even going to make that decision right now. And these photos aren't necessarily the ones you're going to print, either- you're just getting down to the really good ones and weeding out the extras (and weeding out doesn't necessarily mean delete- I never delete photos, though I know that everyone has a different take on that). Think of this step as simply choosing any and every photo that you would want to put into a regular photo album if you weren't a scrapbooker.
This is also the step where, if you choose to, you can edit your photos.
Step 4: Box it Up
Now we're down to the fun part- assembling a "kit" of sorts to scrap from. This kit can take on so many forms, like perhaps an actual album such as the fantastic Disney book that May Flaum has been showing us this week, filled with divided page protectors of photos right next to layouts. Or maybe you just want to print your photos and put them all in a box or drawer to have at your fingertips when the urge to make a layout strikes. This is a favorite trick of Shimelle Laine's- she printed mounds of photos from an around the world trip, then placed the 4x6 prints in a drawer to be scrapped into layouts as she has the time and inspiration to do so. If you want to print your photos for a traditional album that's all layouts (using photos that may or may not be 4x6), I have a super long, detailed post here about organizing, resizing, and cropping photos for an entire album from start to finish.
Maybe you're not ready to print your photos yet, and a digital route is a better answer for you right now. In this case, it might be worthwhile for you to put all those photos onto a USB drive for use in a digital photo frame, on a photo slideshow capable television, or in a Flickr album. My personal favorite thing to do at this point is to blog all of my chosen photos, complete with little snippets of information or stories about them right along side the pictures in the post, as I did with my Aruba vacation photos from earlier this year.
If you're a digital scrapper or will be going the digital route (perhaps with a photobook) with this particular batch of pictures, then you'll want to either export (if you use software such as Lightroom) or copy the photos to a working folder for use in your project later. (And I'll be back later today with lots more on the photobook subject!)
If you're having trouble deciding on a format for your project, May Flaum put up a fantastic post yesterday with some questions you can ask yourself that will help you decide.
Step 5: Scrap It (Traditional)
Note to digi scrappers/photobook makers- this section is strictly about traditional scrapbooks, but I'll be back later today with a special post on digital just for you!
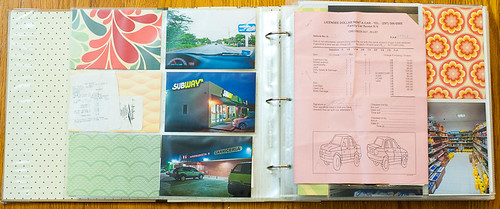
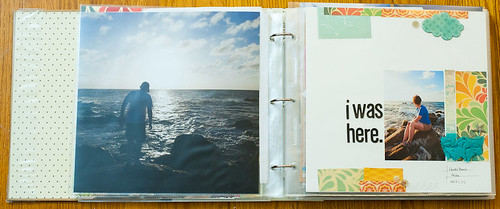
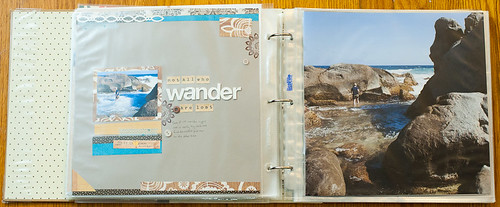
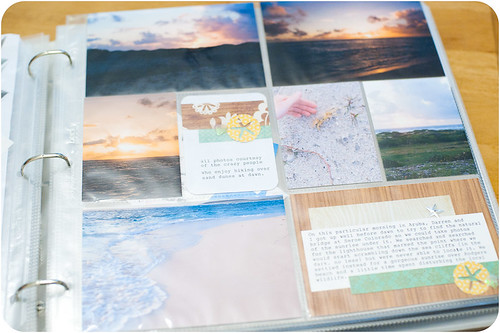
In reality there's some blending between Step 4 and Step 5, especially if you go ahead and blog your photos ahead of time- you've done your journaling then- or if you go ahead and crop, resize, and print your photos for specific layouts. You've also along the way probably decided on a format for your album. My favorite type of traditional travel album of late involves divided page protectors, so I'm going to walk you through one of mine that's in progress at the moment.
My album was totally inspired by May's divided page protector masterpiece, but my motivation for doing it this way was completely different from hers. May wanted all of her photos to be immediately out and available for her family to flip through, so she put all of her photos into page protectors right away. I've already blogged all of my Aruba photos, so my husband and I can flip through them on my web site any time we choose. Instead, my Aruba album is more of a purely crafty pursuit- something I can pick up and work on a little bit at a time here and there as I feel like it with no pressure to get it done by any certain date- I didn't even stress over trying to finish it for this blog post! :)
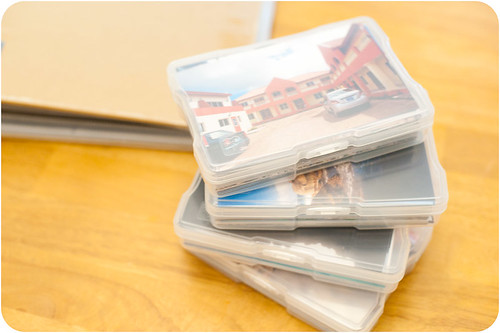
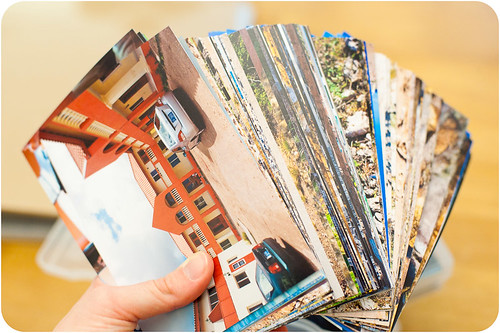
As I mentioned, I decided to go with divided page protectors for this album. I had all my photos printed at 4x6 (Snapfish had an awesome sale when I ordered them), and they're organized in boxes, in order, just waiting to be added to the album.
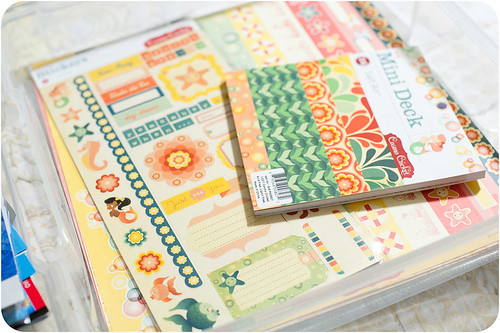
I'm allowing the album itself to come together slowly. All the supplies are kept together in a single project box, so if I get invited to a last minute crop and need a project, all I have to do is grab the photos, album, and project box (plus a few tools) and head out the door!
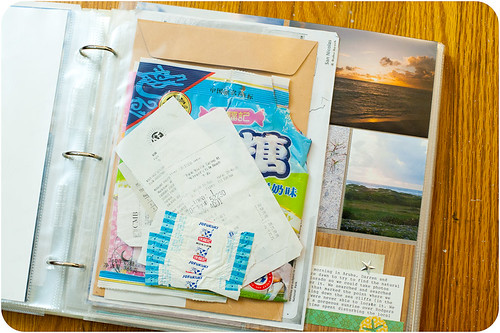
The pages are a huge mixture of configurations and sizes- everything from straight 4x6 photo pages to massive 12x12 single-page photos. I'm also taking an iterative approach to things- on my first pass through the album I'm concentrating just on placing things. On my second pass I'll do things like add embellishments and make things like those two receipts shoved into a page protector slot look a little more polished.
I'm also inserting any layouts I happen to make using photos from this trip right into the album. The whole thing is ordered chronologically, so when I finish a layout (or have a big photo printed), I just stick it in the appropriate spot.
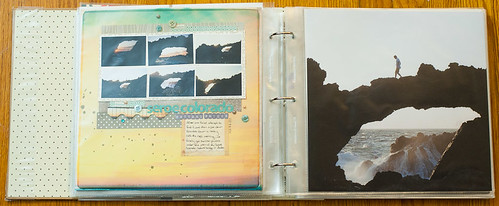
I'm also not too concerned with having every layout be made with the same supplies. I do have a set of supplies that I'm using for all the divided page protector pages, but there's definitely room to mix it up a lot in here.
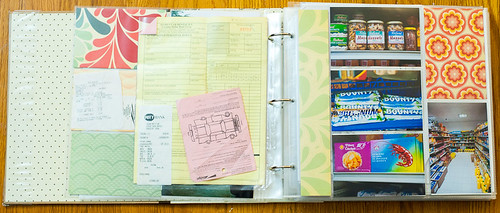
Oh, and all that stuff that got collected on the trip? I sorted it by day, as well, and have a page protector full of ephemera at the beginning of each section (each section represents a day of the trip). This stuff will get pulled out of this temporary storage space and placed into pages alongside photos as this album continues to take shape.
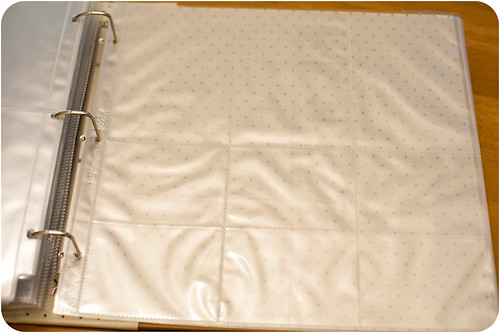
As part of my "kit" for this album, I pulled together an assortment of empty divided page protectors and placed them in the back of the album. This slide sorter page will be perfect for holding coins and little items that we picked up along the way- I'll simply stitch the top of it closed to keep them from falling out.
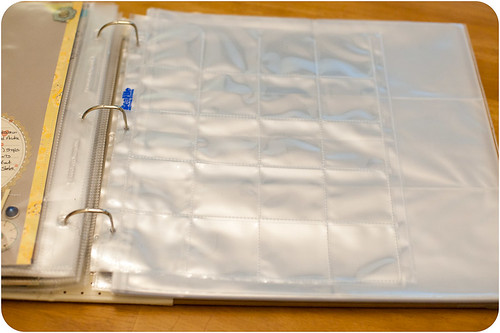
I love We R Memory Keepers divided page protectors because they come in so many configurations. Amazon carries a few of them, along with some American Crafts varieties.
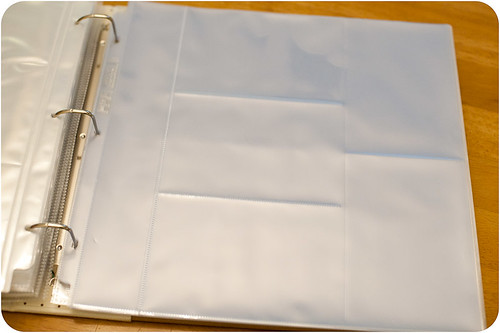
Becky Higgins' Project Life page protectors are also wonderful to use for this type of project...
...in fact, I've been known to simply scrap a layout in one of them from time to time!
If you want to see more examples of scrapping albums using divided page protectors (I've already linked up May's fabulous one above), then you might want to check out examples here and here by Laura Vegas, and also here on the latest installment of Shimelle Laine's 4x6 Photo Love class.
And if you're a digital scrapper, or just want to check out the whole photo book thing, be sure to check back later today for a post with some tips on that!