
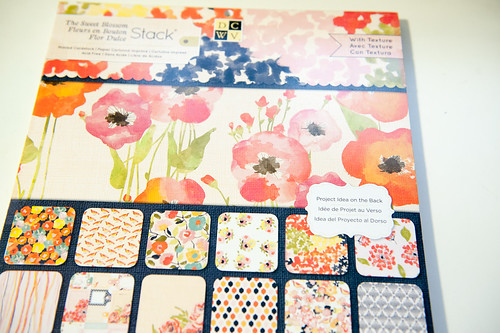
The Sweet Blossom Stack takes the pink/coral/orange color scheme that's been so popular at the last two CHA shows and mixes it with just a bit of mint green and navy (another up-and-coming color this season) in a set of stunning watercolor (yet another ongoing trend) floral patterns. All of that is printed on heavyweight cardstock and finished with a rich linen texture. There's also great news for those who don't like pre-glittered papers- there's none here!
Here's a peek at just a few of my favorite sheets- I could have included them all because this is a stack where I really like every design!


This strip print was especially appealing to me, along with the sheet of cut-out tags and journaling blocks at the back of the pad.


I put everything together with a few dimensional embellishments from my stash to make this layout, and since I've had several requests to share more start-to-finish posts after I blogged my scrapbooking process over at Pink Paislee, I decided to take step-by-step photos as I assembled this page. I can't promise that I'll do this with every layout from now on, especially when I scrap on travel under challenging lighting conditions, but there will definitely be more posts like this.

Just a warning- what I'm showing is my completely unscripted process, complete with mis-steps and changes of direction. It's kind of a wild ride, so buckle up!
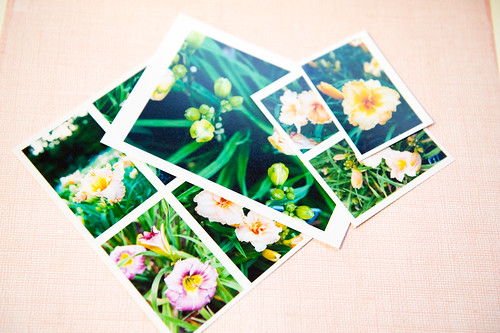
Since my papers were already chosen for me, I was able to skip straight to photo selection. The group below were all shot on the same day, and I purposely printed more of them than I intend to use on this page. Aside: I use Lightroom to prep smaller photos like the 2x3 prints to be sent off to the developer. If there's any interest in seeing a tutorial on this, let me know in the post comments and I'll work on getting one scheduled.

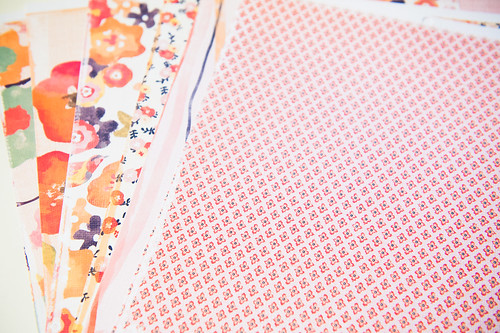
With photos selected, I flipped through the paper pad and chose a sheet to use as my background, deciding on this pretty pale pink linen print instead of a sheet of plain colored cardstock.
I also selected a variety of sheets that I thought would work well on the page. While I do like all 24 patterns (2 of each sheet are included) in the stack, I can't really use them all on one layout! Narrowing down the choices at the beginning really helps me not get overwhelmed with decisions.
I also pulled out the two cut-apart sheets (the strips and journaling spots) to remind myself that I wanted to use some of these elements.

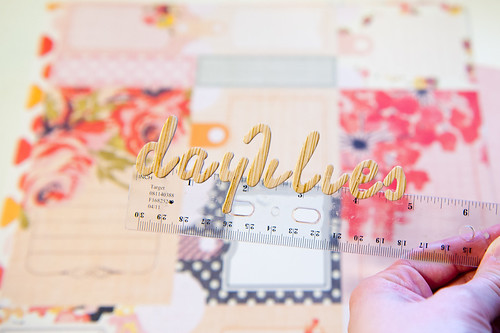
And, of course, a title on a ruler. Which is kind of like a pancake on a stick, but not. I've blogged about it before, but in case there are any new readers, I spell out my titles on clear rulers so I can move them around on the layout without sticking them to the paper until I've decided on a final placement. It's a very small thing that's really helped me speed up my design process.
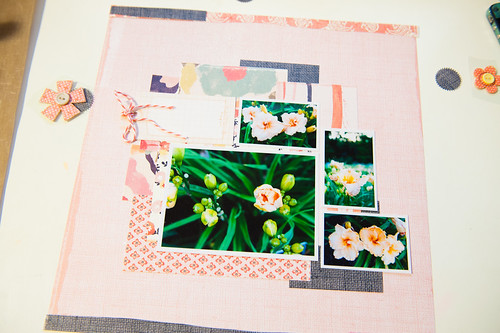
Then it was time to get down to actually designing the layout. I was a little nervous about this one as that larger photo in the group is much bigger than what I typically use. I've been experimenting with new layout designs, though, and this is just part of that process. It didn't take long before I found an arrangement I liked.

Next I added a journaling tag hand-cut from the larger sheet in the collection and added it in, just to make sure I actually left room for my journaling.

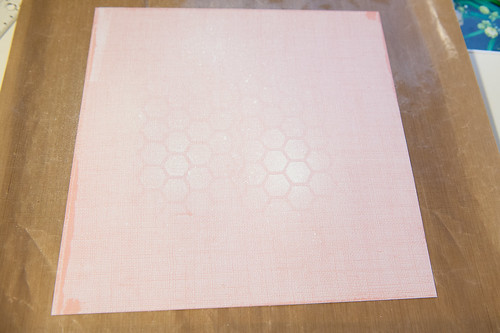
At this point I thought that a little bit of extra contrast behind the photos might be nice before I started adding paper layers. The fact that this honeycomb mask from Studio Calico had just arrived and I was itching to play with it had nothing to do with that decision. At all. ::ahem:: ;)

I sprayed the mask in two locations on the background, then went on to play with other parts of the layout while the mist in the center dried.
While I was waiting, I cut into the strip paper to start experimenting with colors to line the top and bottom of my layout. I almost always put paper strips and bits here, but often I wait until the end of a layout before deciding on final colors- these strips are sometimes the last bits I add to balance a page out. Still, it's fun to play!

Okay, playtime is over and the mist in the middle is dry, so time to get back to business. I added my photos, title, and journaling tag back to the page and immediately realized that most of the misted hexagon pattern in the middle has been covered up. Hmmm. And there are still paper layers to be added under the photos that will likely cover more surface area. Double hmmm.

In the end, I decide it's not a huge deal if it gets covered up. Masks are reusable and I have plenty of mist, and there are still little splatters showing here and there. So, on with the paper layers!

I added layers in two rounds on this layout- the set above and the set below. This is a process of adding a piece, removing a piece, unbalancing and balancing until it just feels right. And now it's totally apparent that the inclusion of that large photo has changed the style of the layout from my norm- I'm liking it, though! Note that at this point I haven't glued a single thing down at all- we'll get to that later.

I ended up completely tossing out my original ideas for the strips at the top and bottom of the page and going with this arrangement instead. Love how the navy helps ground everything.

With the paper placement wrapped up, I turn to embellishments. This is where I get to dig into my stash since this collection is just paper. I could have pulled out dies and punches and made my own embellishments out of paper, but I knew I had items that would work already in my supplies, and within a couple of minutes I had pulled this small stack of items out. I knew I probably wouldn't use all the items, but I wanted a few options available. And, yes, I do actually use those items I buy on closeout at Tuesday Morning- note the tag on the Basic Grey Hopscotch Blooomers below!

With the addition of a Martha Stewart Medallion punch, these embellishment groupings came together quite quickly!

Here's a hint about testing designs with self-adhesive embellishments- cut out a small piece of the backing around the sticker and leave it there until you're ready to stick it for good. You're then free to move it around however you like!

Time to mist the butterflies (Studio Calico's "Boss Lady" Mister Huey is a perfect match for this collection)...

...and then come back and glue down the paper layers while they dry. I mentioned earlier that nothing is glued down, and that's because I use a crazy top-down gluing approach. I start with my top layer (the photos in this case) and put a good amount of adhesive on the back of each one before sticking it down to the layers below.

Those glued photos help hold the layers underneath together, and I end up with a top piece that looks like this after round 1 of gluing.


For round 2, I put adhesive on the back of this big stack, then stick it down to the remaining bits on the layout (which also adheres it to the layout background itself). Normally it only takes two rounds of adhesive, though every once in a while I need a third.

There, all stuck!
Before I add the dimensional embellishments back in, I take the page over to the sewing machine and stitch all over it- love the detail this adds.

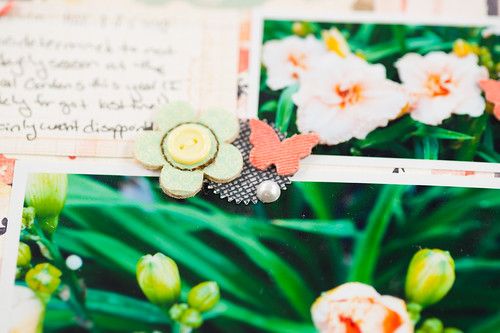
Then it's time for the title and embellishments! I'm especially happy that I remembered to dot the "i"s on this one- I do forget that sometimes!


After sticking the embellishment clusters down, I thought they needed just a little something more. I pulled out a set of self-adhesive pearls (of the classic Kasiercraft variety) that I've had around for years and used a few of them. Perfect!


Normally I clean off my desk between every project to make room for a new one, but since I'm going to be using this same set of supplies on an upcoming Project Life layout it's still all scattered across my desk. Look for that post next week, as well as lots of other scrapping goodness during the remainder of this one.
Thanks for stopping by!
Supplies (click on images for product links):